Adding customization to your Shopify product
This article refers to Smart Customizer Web to Print App Version 2.0Explore the Version 1.0 article here
Before we get started
- There are two possible ways to add customization to your product: by installing our predefined product template or simply by adding customization to a Shopify product that already exists in your store.
- To add customization to your Shopify product, you’ll need to set up the Smart Customizer product template settings manually.
- Make sure you have all the necessary information before the product customization setup. You may need both visual and textual information like product real-world scale dimensions, print area dimensions, the model image that will be used for customization preview, and more.
Adding customization
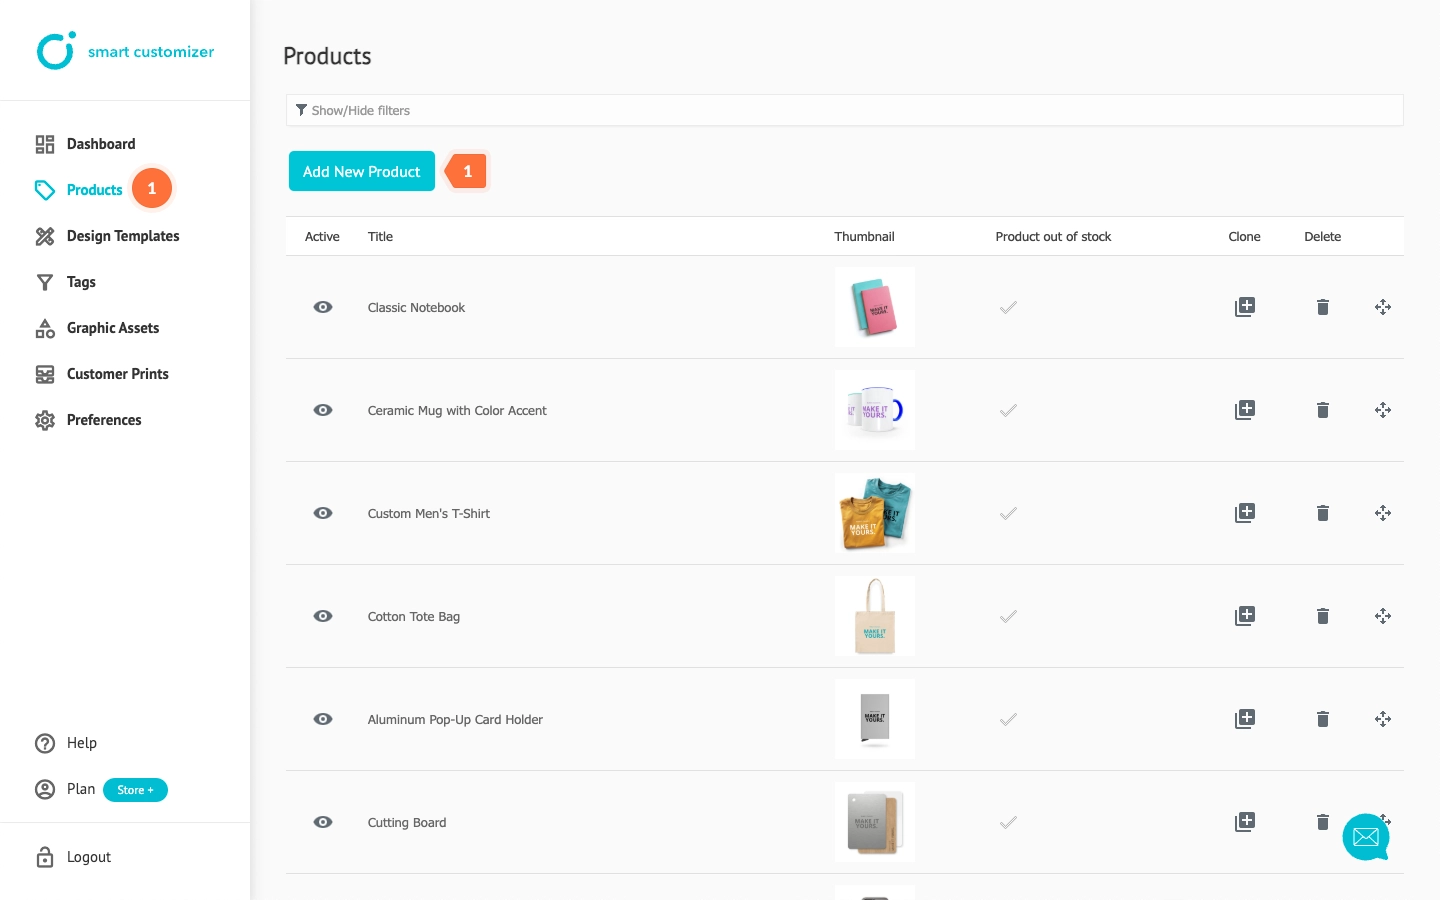
- Go to your Products and click Add new product.
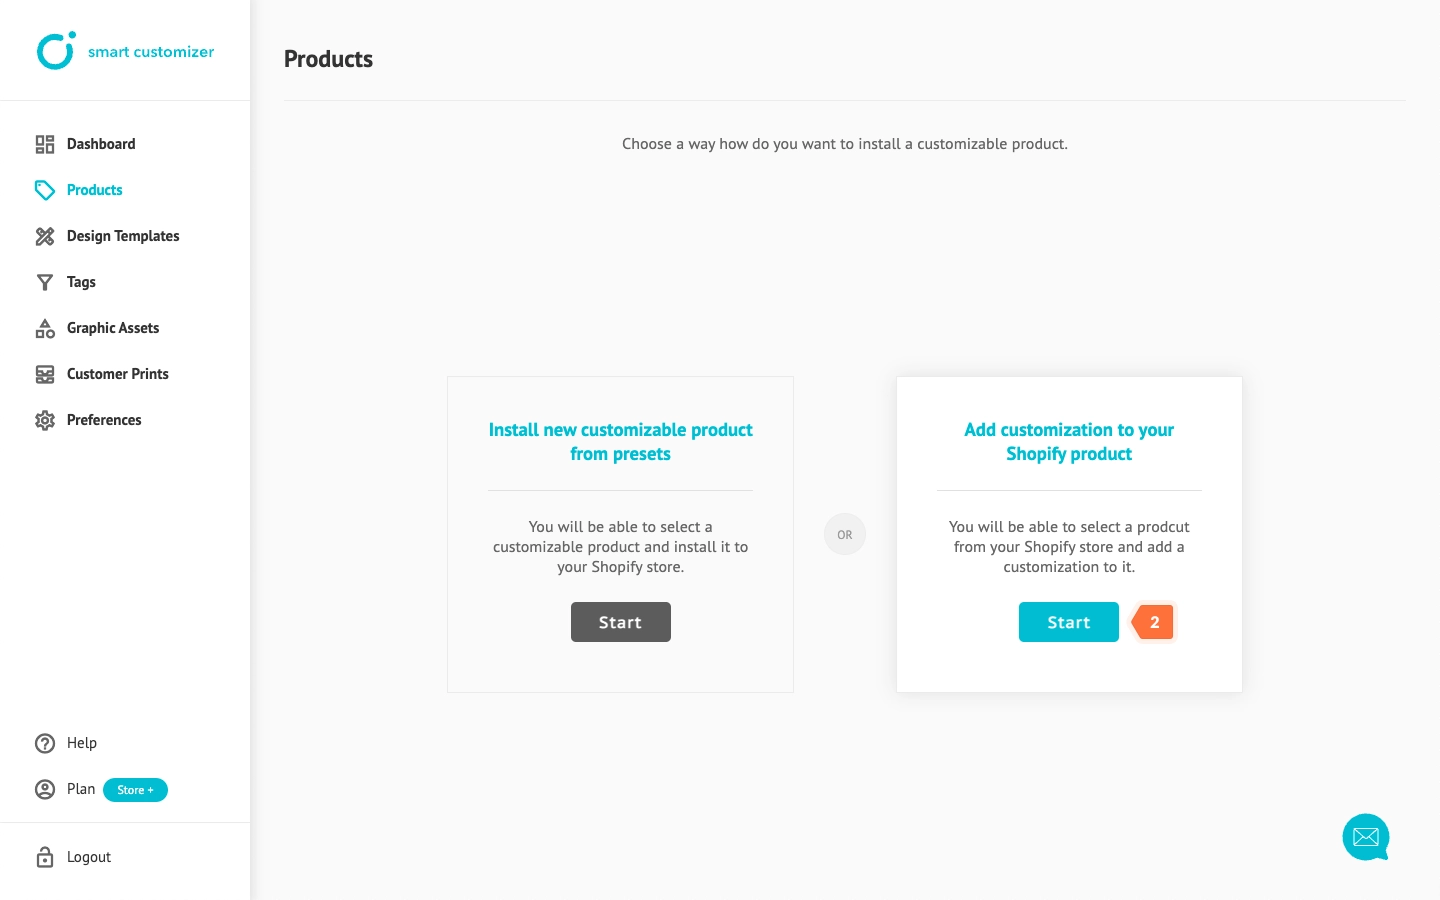
- Select Add customization to your Shopify product and click Start.
- Select the Shopify product you want to add customization to. You can use the search bar or simply click Add customization on product. If customization is already added, an info text Customization Added will appear on the product.
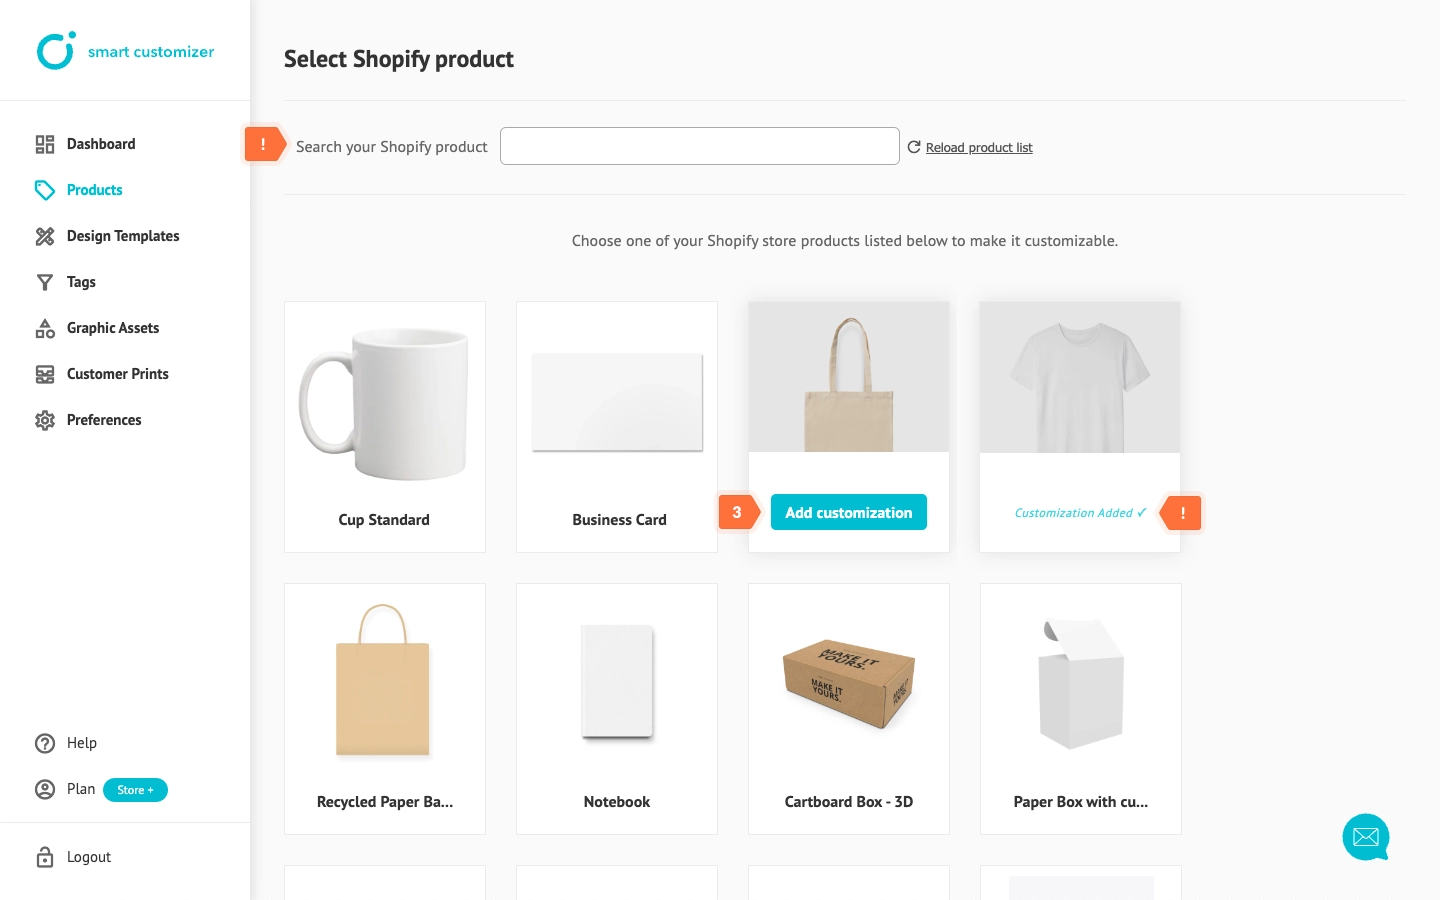
NOTE: Please check the product status in your Shopify store. If the product is set as Draft, it cannot be previewed in our app. However, you can preview draft products directly in Shopify by navigating to Shopify Store > Products > Open your product > View. To preview the customizable product in our app, ensure the product status is set to Active. - Name your product using the Title field (only for internal use).
- Click Save.
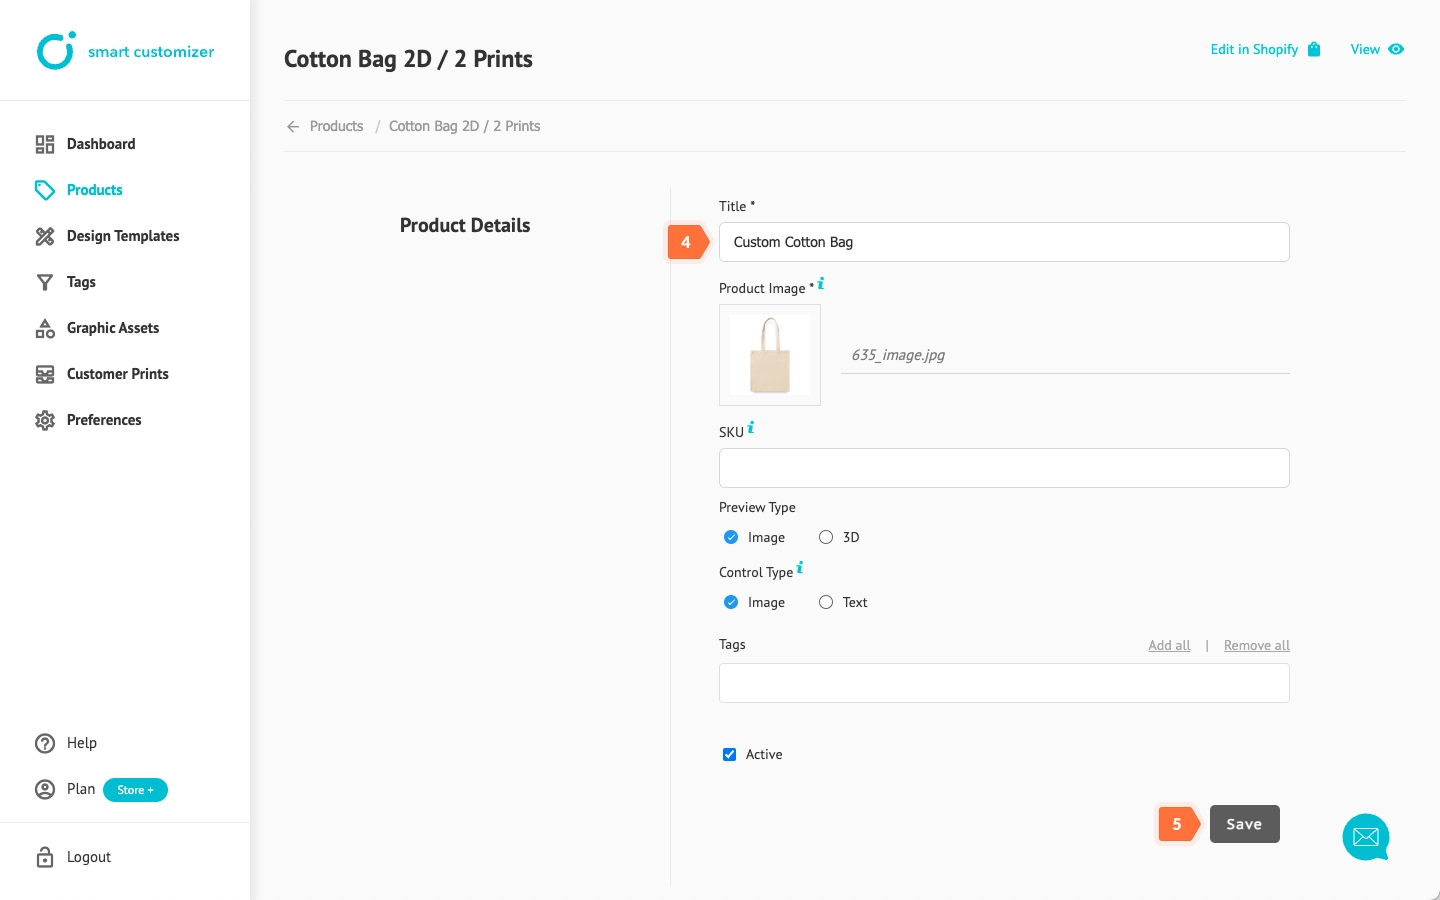
Continue with a customizable print area setup.
Print area setup
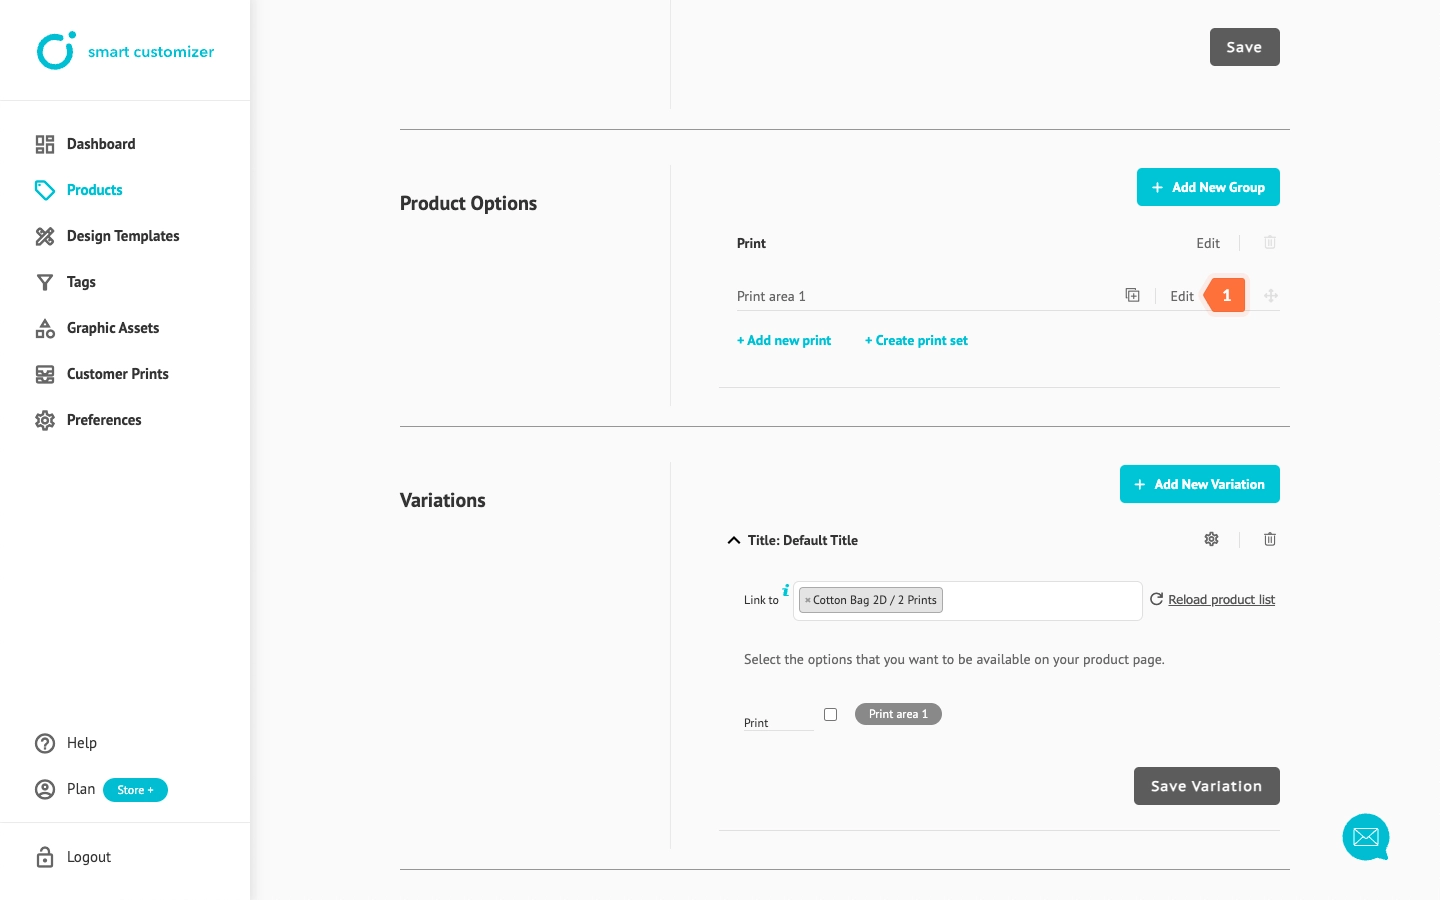
- In Product Options > Print > Print Area 1 click Edit.
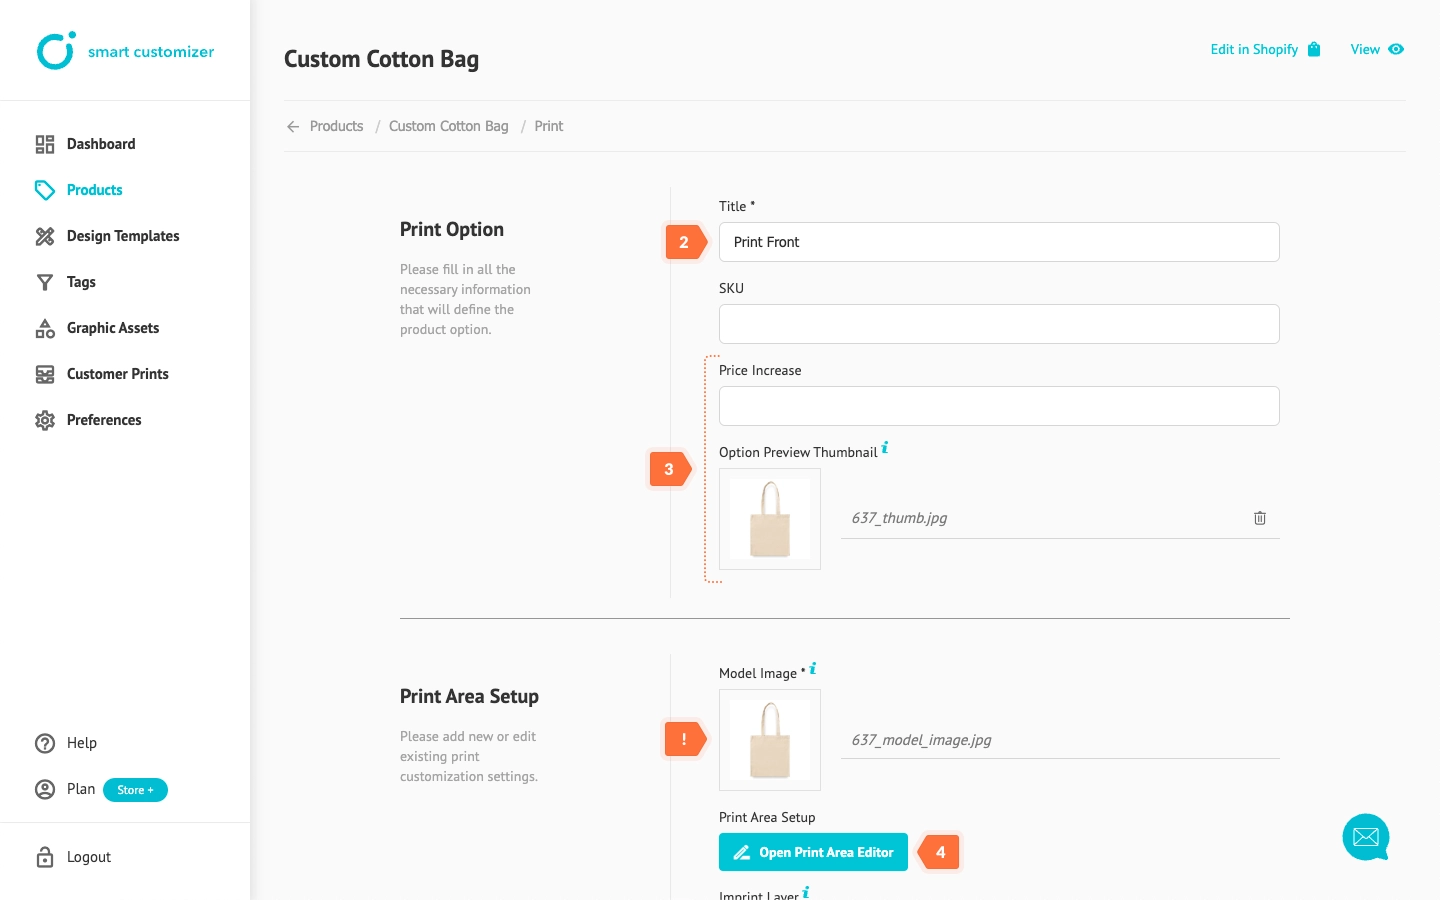
- Update the Title (this is visible if you have multiple print areas).
- Enter a Price increase and update the Option Preview Thumbnail (optional). NOTE: You can reuse the same Model image generated from your Shopify store or upload a new one. If you upload a new image, make sure to save it before editing the print area.
- Click Open Print Area Editor.
- Place the ruler on your model image and adjust the arrows so they touch the sides of the product. Enter the length of the ruler based on the real product dimensions.
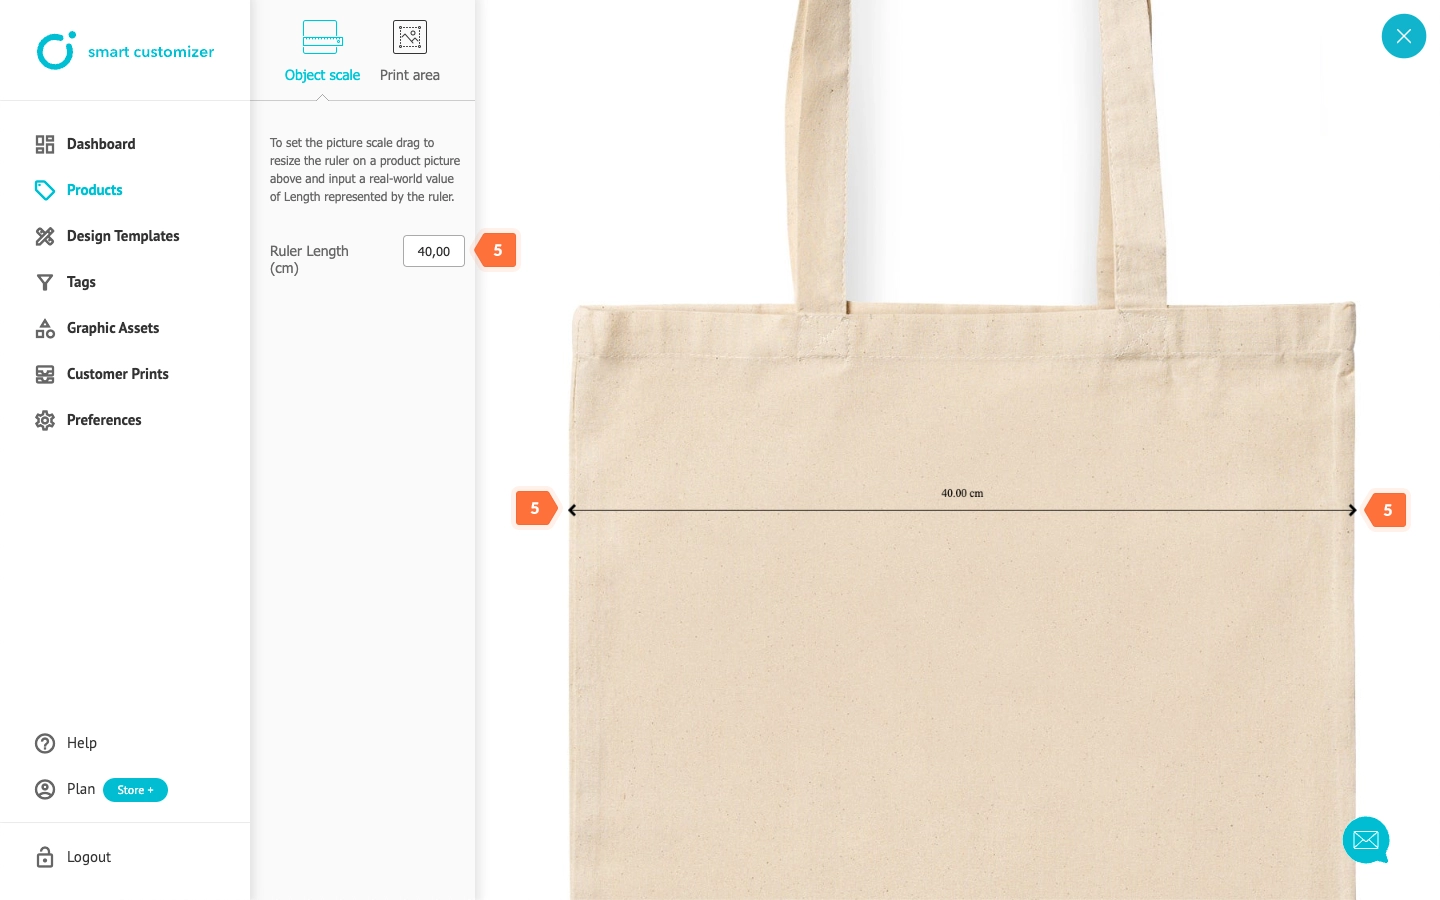 NOTE: If you want to change the unit system from metric to imperial go to Preferences > Units > Select unit of length.
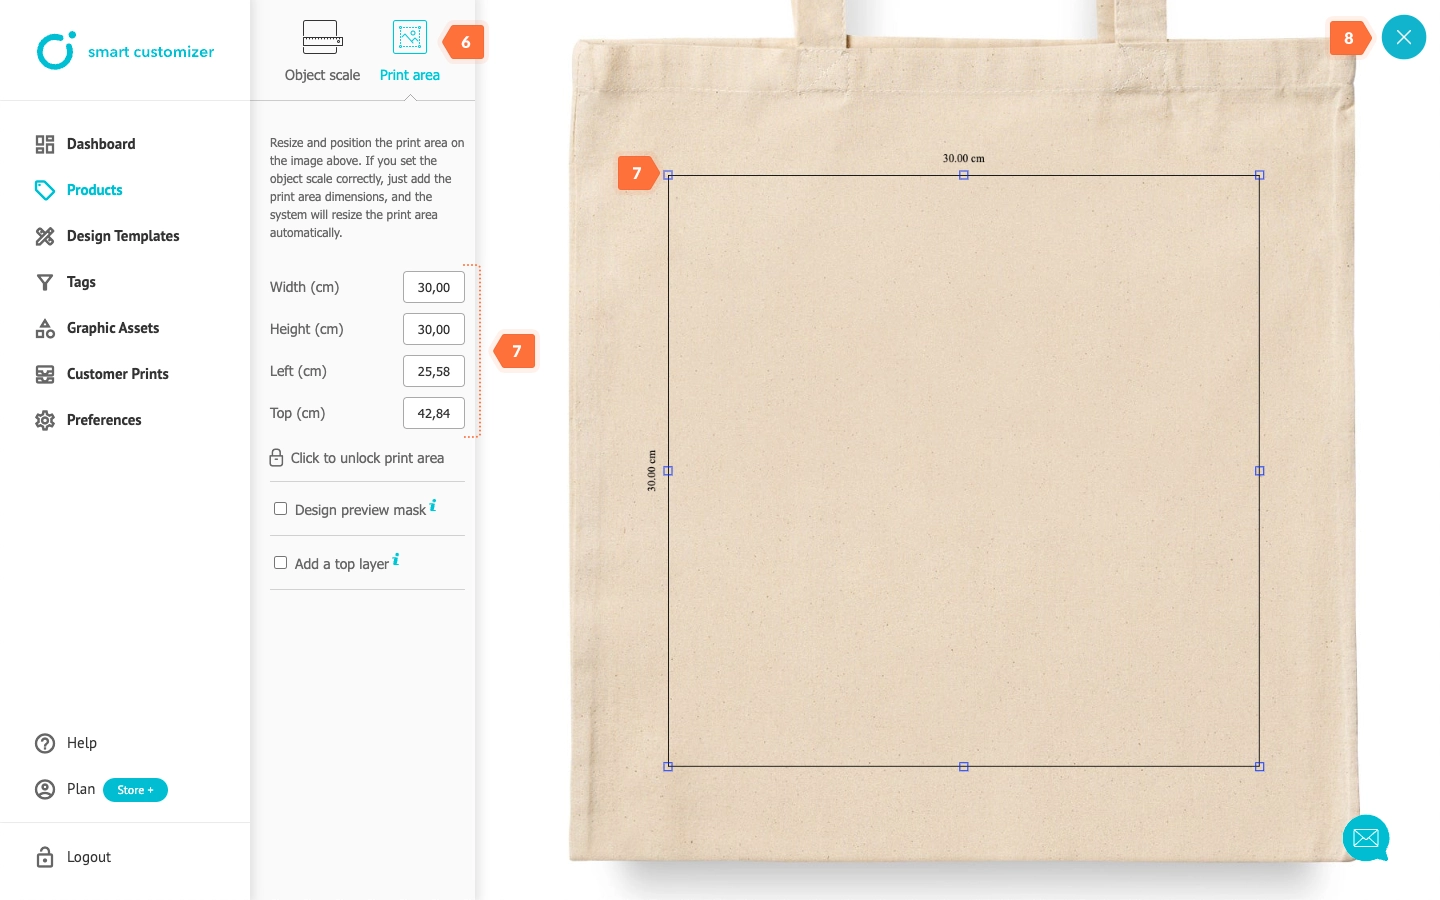
 - Switch to Print area settings.
- Add the print area dimensions (width, height). The placeholder will automatically resize to match the real-world scale set in the previous step. You can fine-tune the placement and size by entering dimensions or dragging the blue squares.
- Click X to close the editor window.
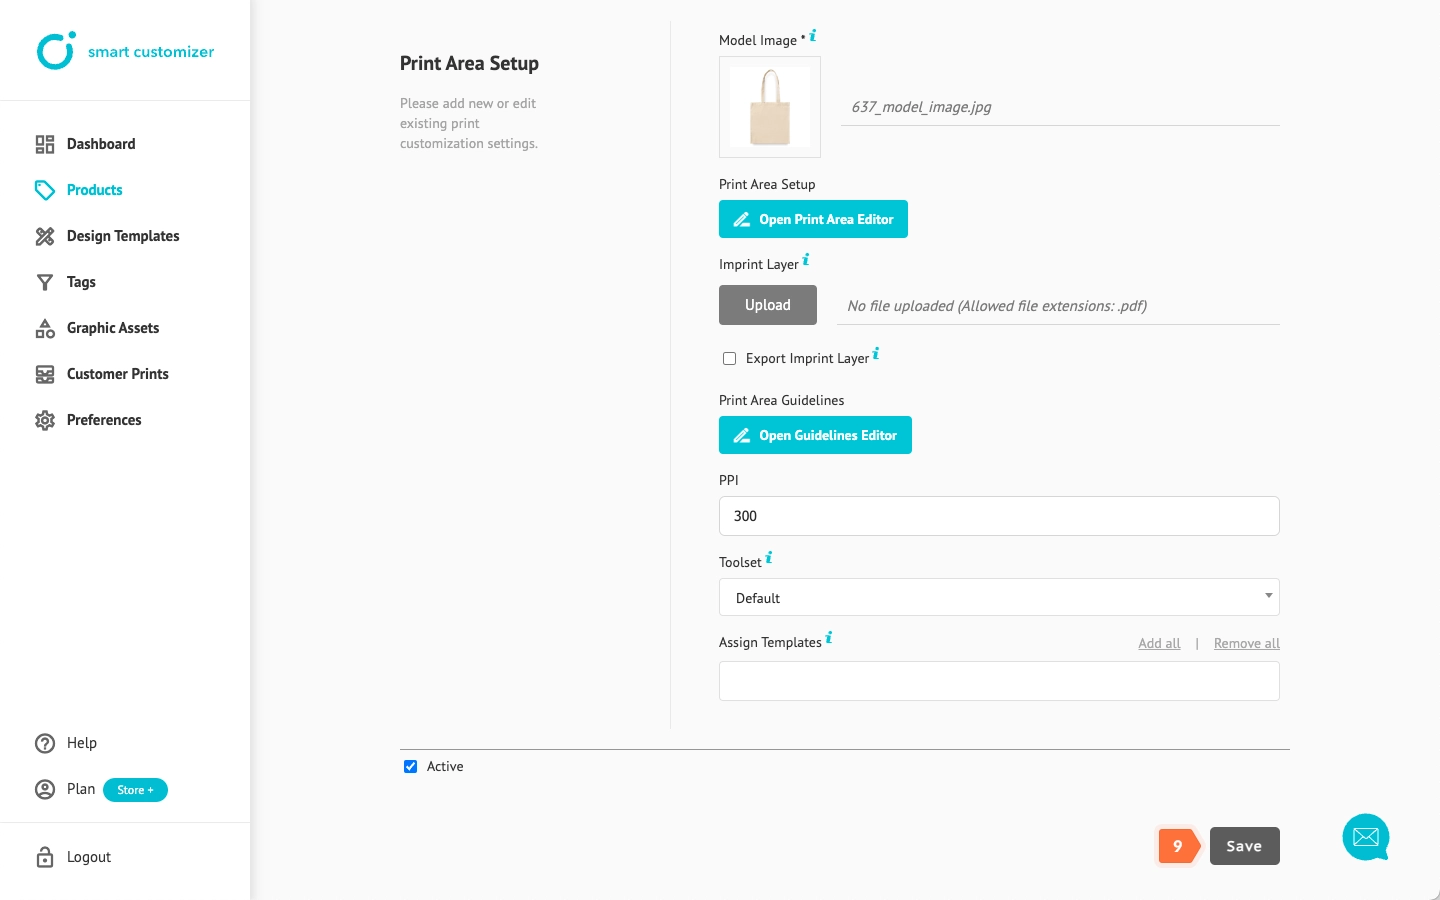
- Once everything is set up, click Save.
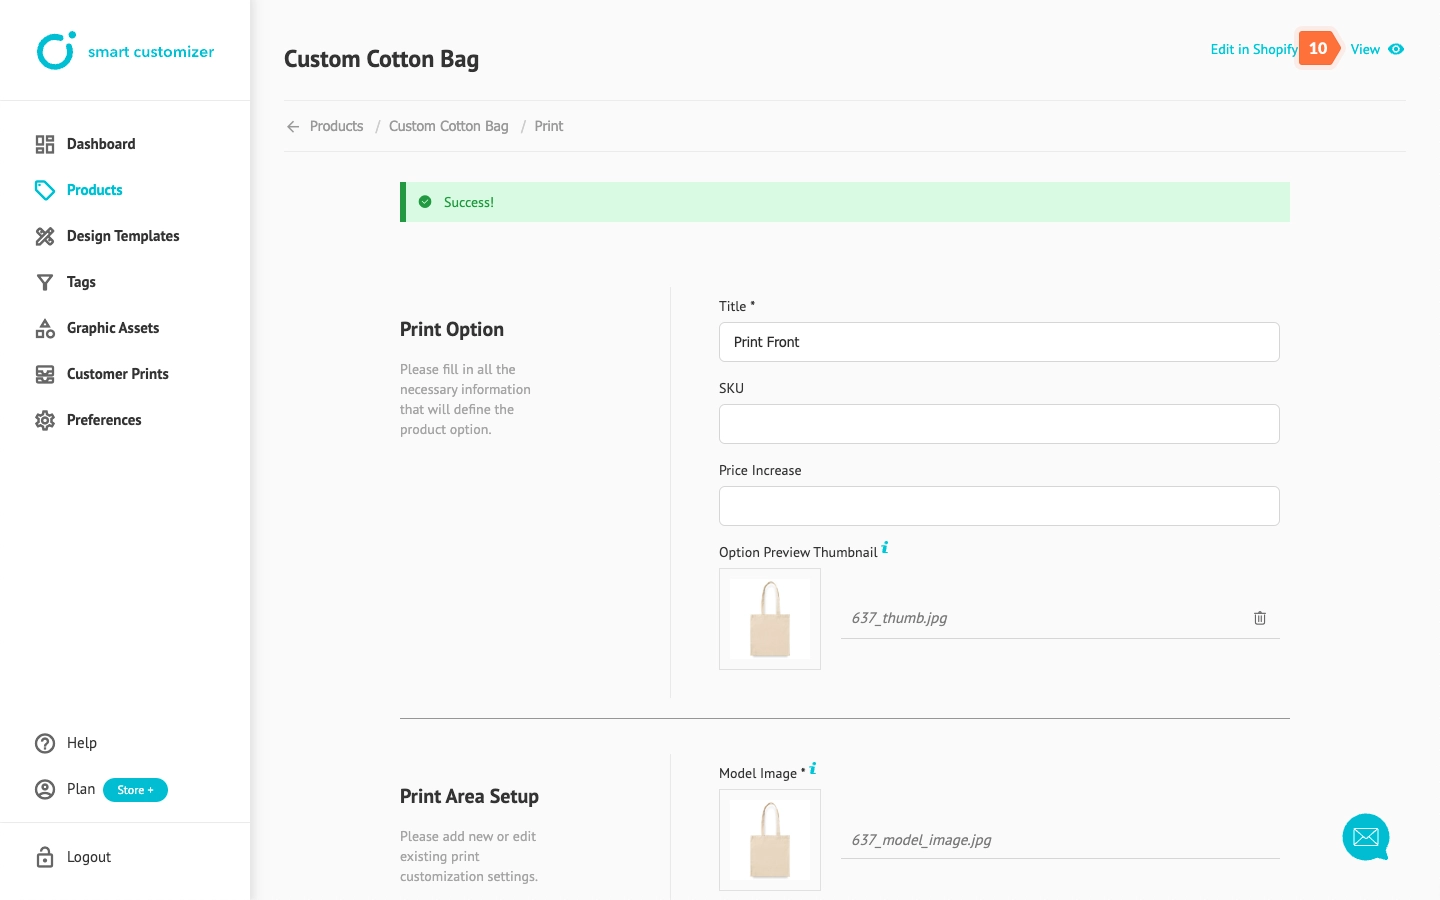
- Click View to preview your product online.
Advanced tips
- If your product has more than one print area, you can add additional prints and create sets. Learn more about multiple print areas.
- Use Print Area Guidelines to ensure that a customer knows where is the safe area to create a design and where all important graphics should be placed. Learn more about Safe print area guidelines.
- Use an Imprint layer for non editable graphic elements like company logo, item barcode and similar. Learn more about Imprint layer.
- Use the Design preview mask to crop the customer's design in a specific shape and size, and use the Top layer for important decorative product details such as shadows, stickers, and similar. Learn more.
- Create color variants of your product. Learn more.
IMPORTANT: products saved with the Visible checkmark enabled will add the Customize Product button to your Shopify product instantly.
