Setting up design preview mask and top layer for 2D customizable product
This article refers to Smart Customizer Web to Print App Version 2.0Explore the Version 1.0 article here
Before we get started
- There are two types of masks available in the Smart Customizer app - Design preview mask and Top layer mask.
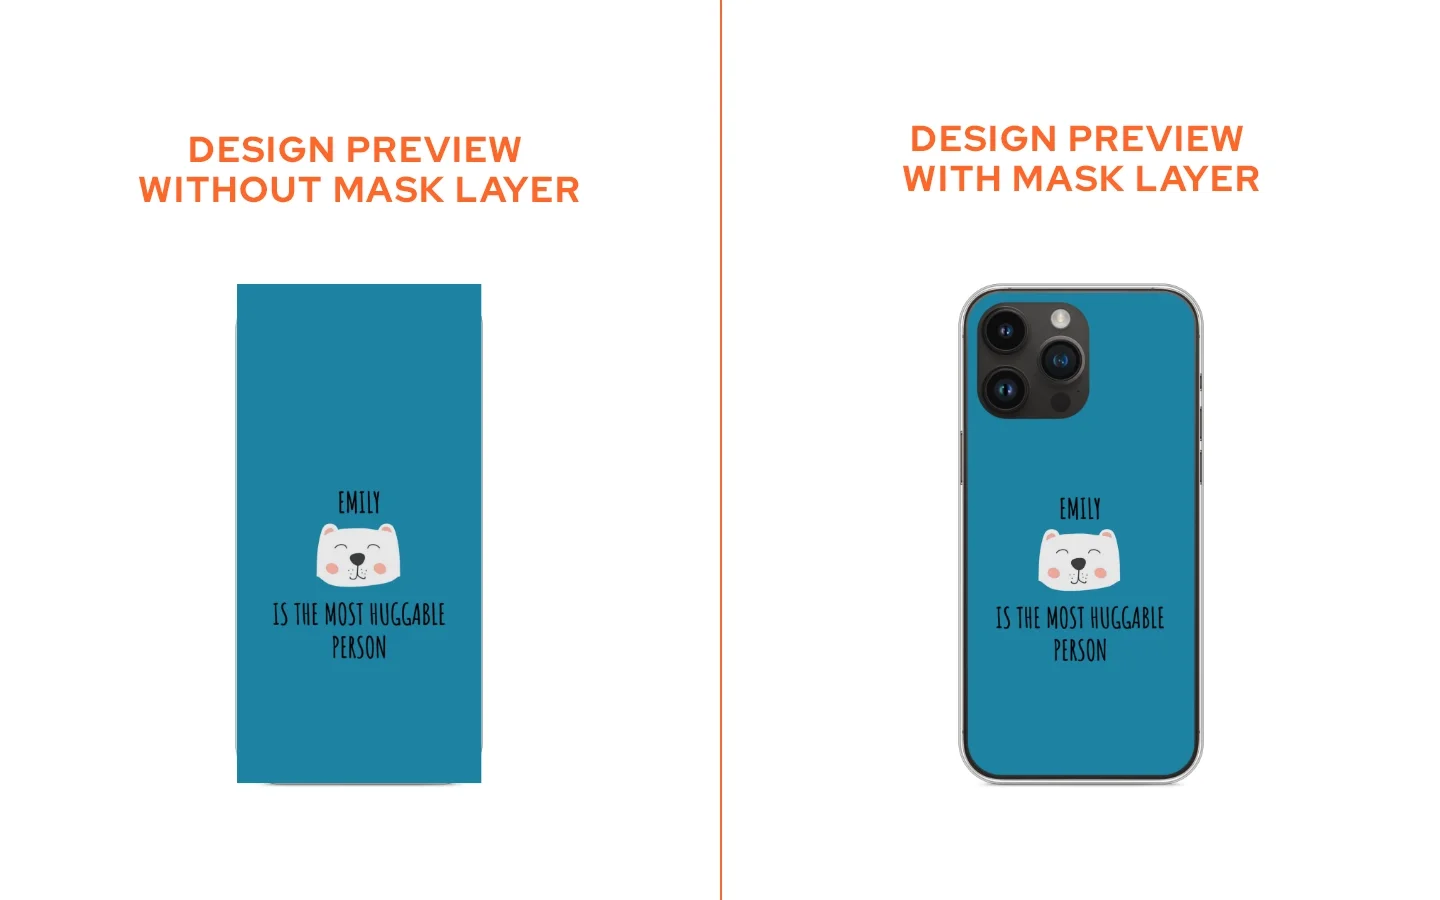
- A design preview mask helps to define the design's visibility boundaries. Everything that is drawn out of mask boundaries is not visible in a product preview.
- Design preview masks can be drawn in rectangular, circular, or in custom shapes imported as .svg file.
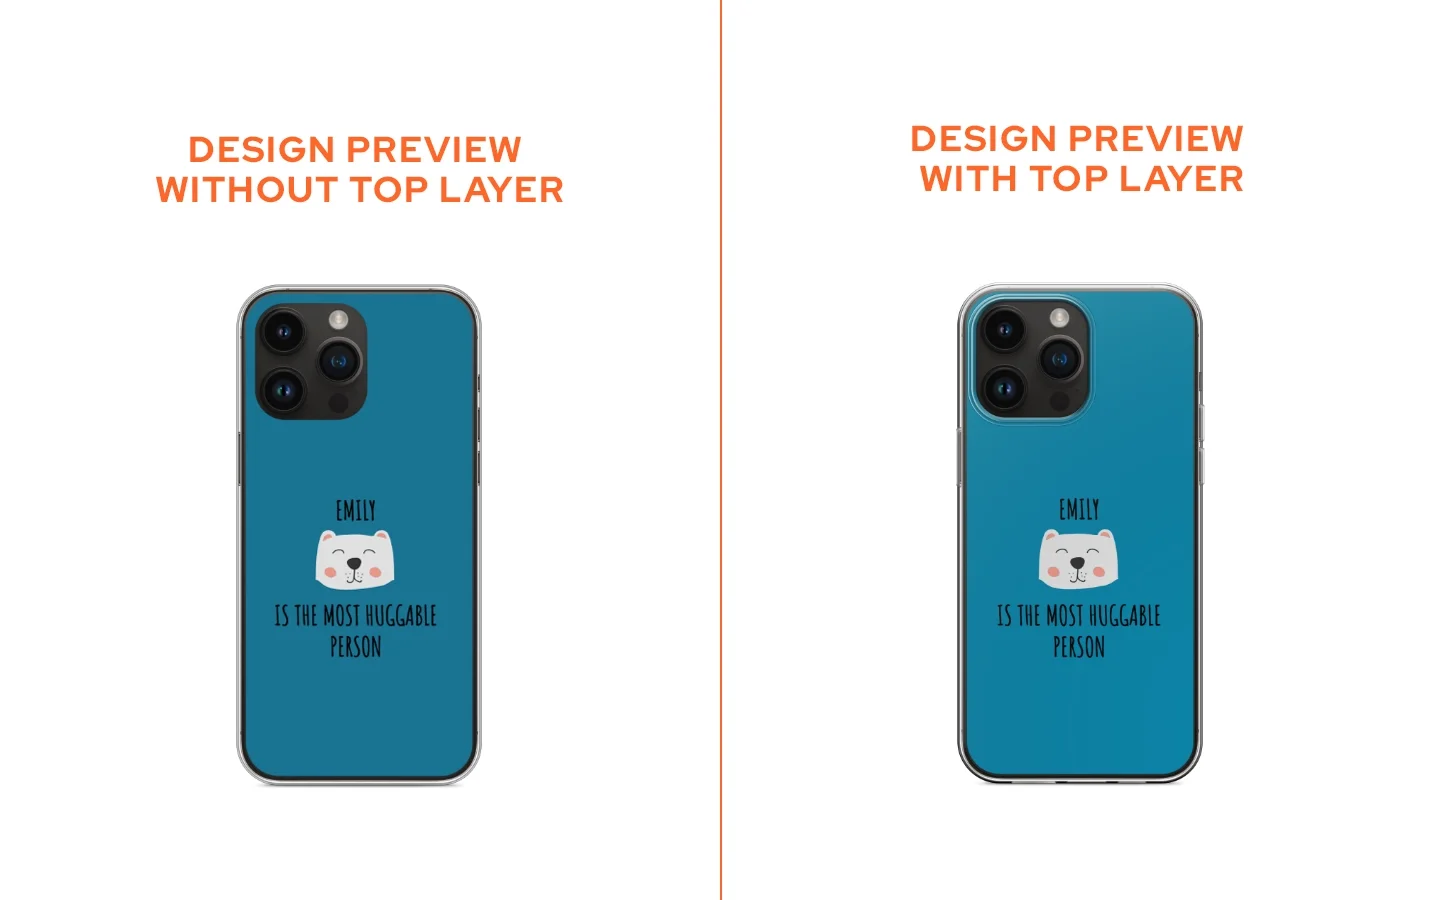
- A Top layer mask is a top non-editable layer of a print file.
- A Top layer mask is mostly used for important decorative details like product shadows, stitches, etc.
- A Top layer mask can be uploaded in .png file format.
Design preview mask setup
- Open your 2D product template.
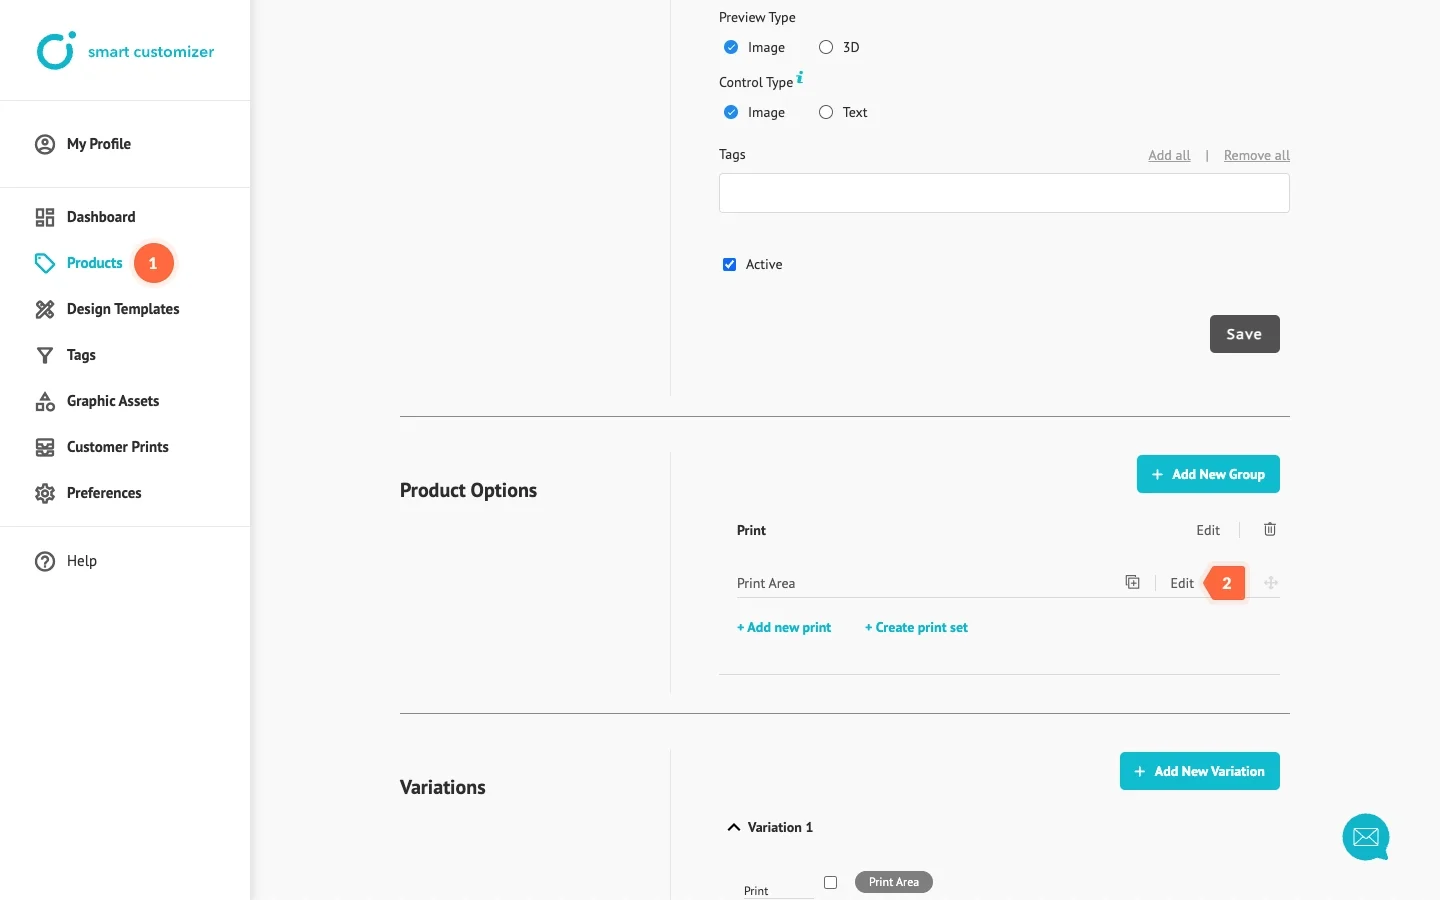
- In Product Options > Print click Edit on your print area.
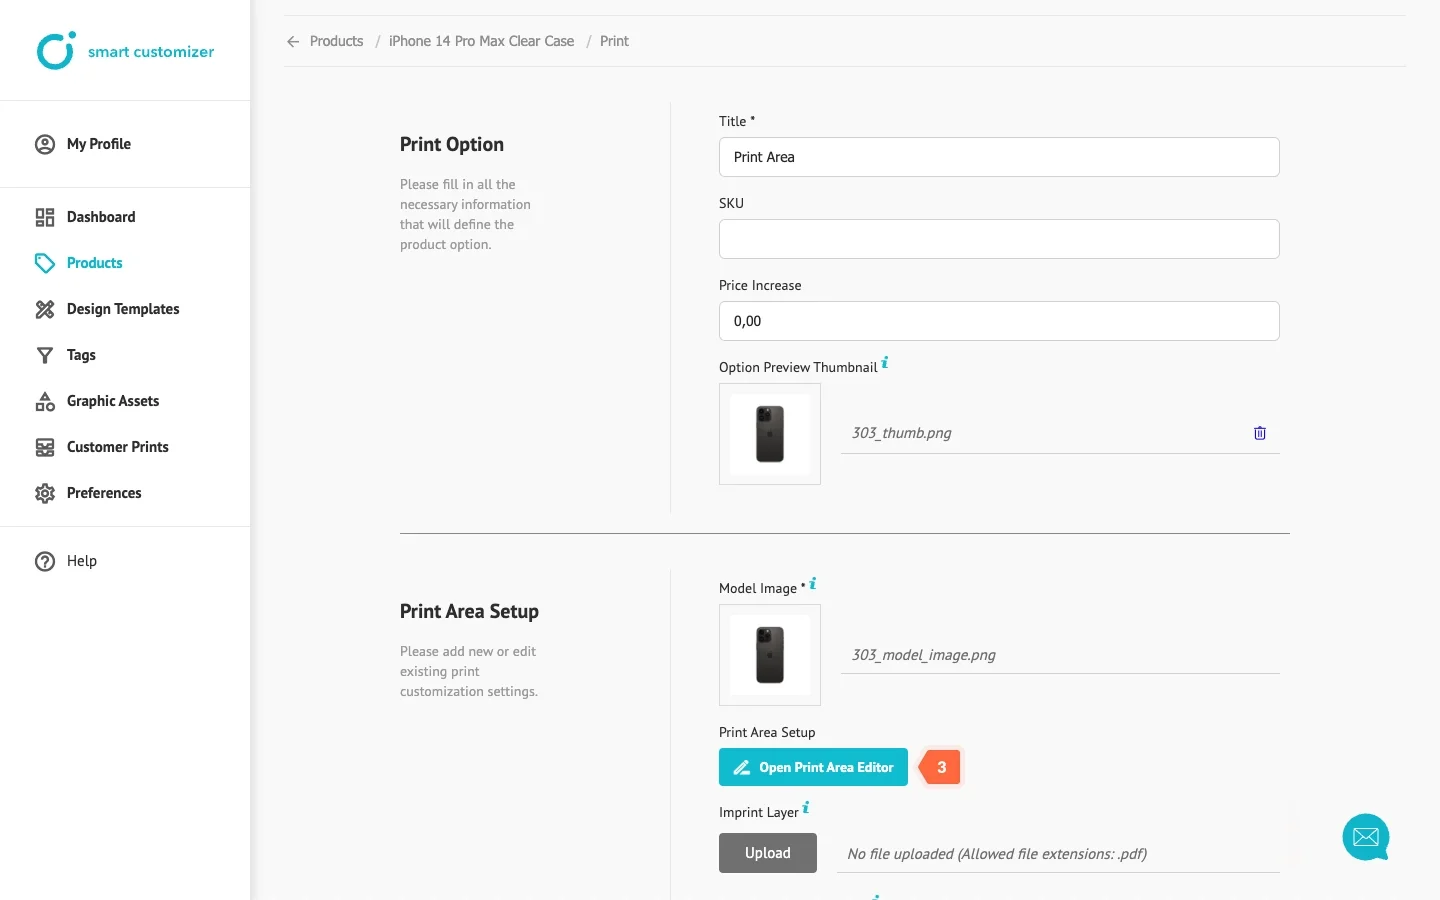
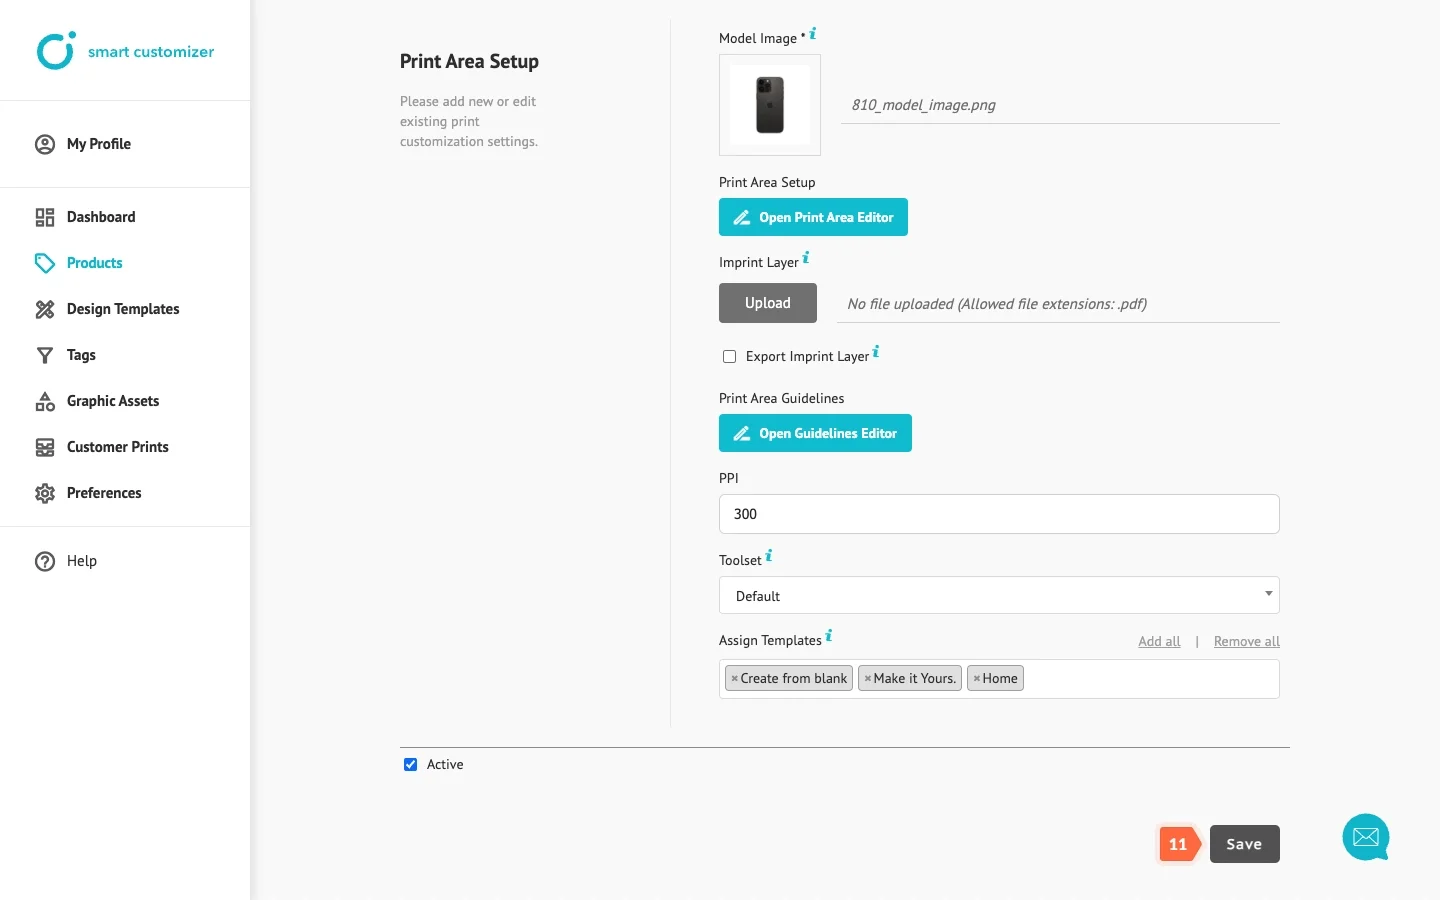
- In Print Area Setup section, click Open Print Area Editor.
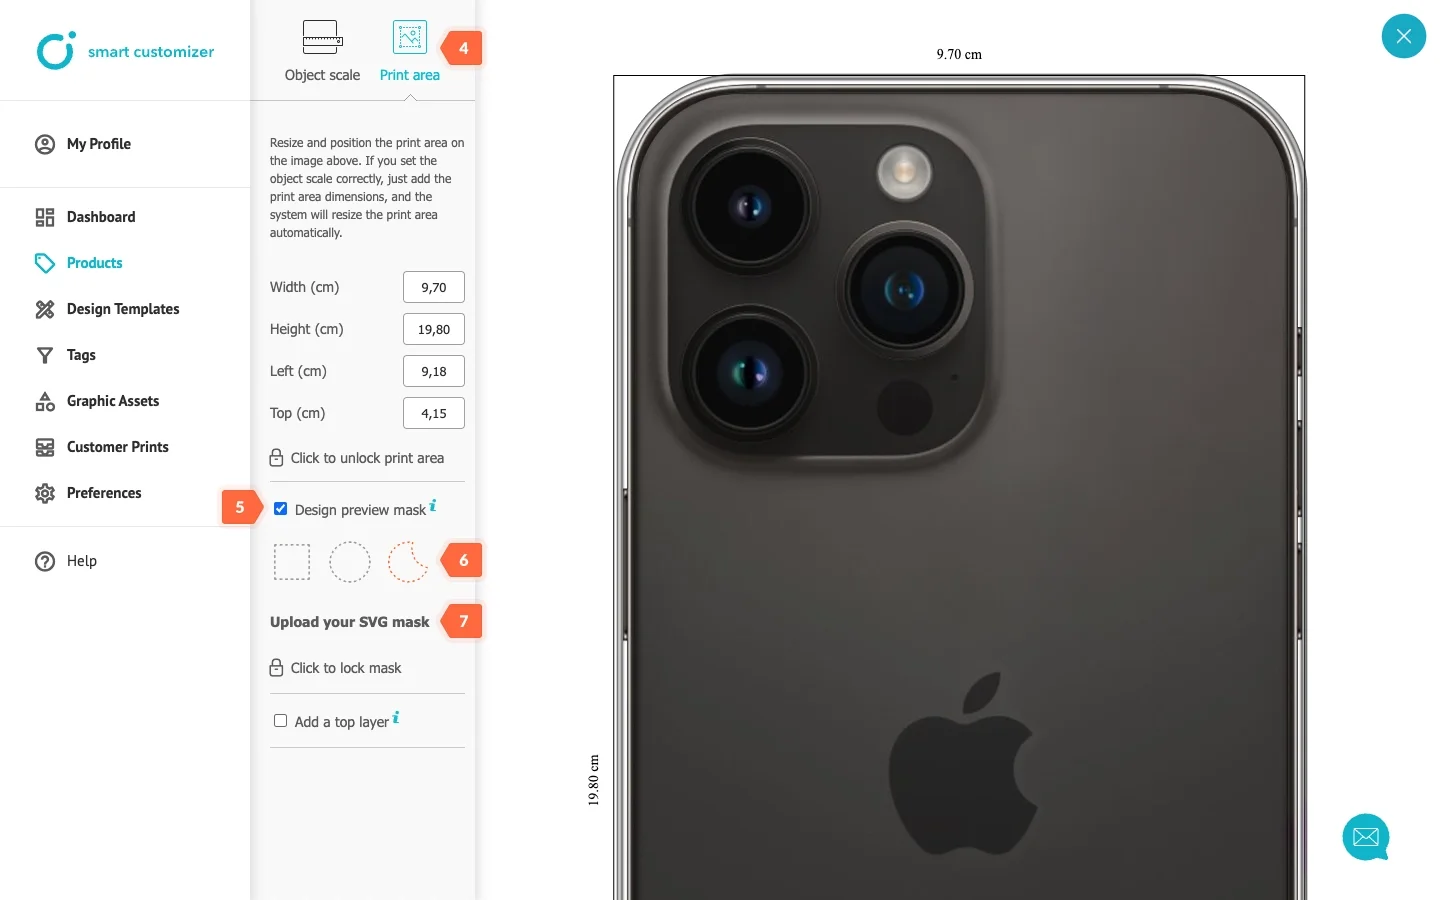
- Select Print area option.
- Activate the Design preview mask checkbox.
- Choose the mask shape: for standard shapes, select either a rectangular or circular mask. For custom organic shapes, such as in this case, choose the custom mask option. Learn more about each mask type.
- Click Upload your SVG mask and add your file.
- Adjust mask size and placement by entering values in the mask inputs or, simply, drag mask placeholder by the corners. Place the mask into the correct position on the model image, keeping in mind that everything out of the mask boundaries will be cut and not visible in the product preview (but will still be included in the print-ready file).
- Once done, Lock the mask in order to avoid accidental movement of the placeholder.
- Click on the exit icon.
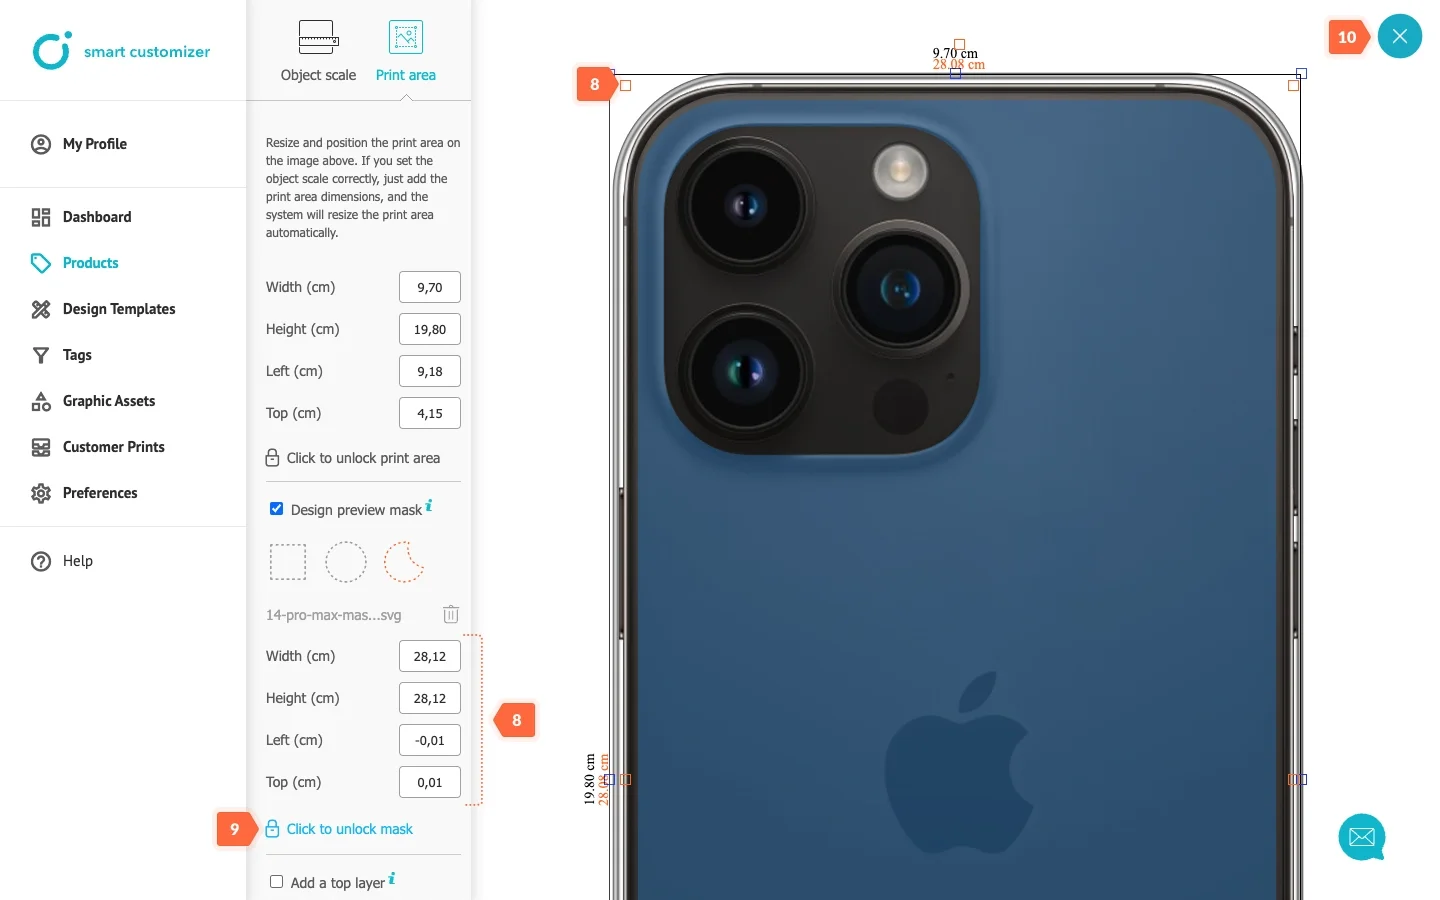
- Scroll down to the bottom of the page to Save changes.
This is a comparison showing how the design appears with and without the preview mask:
Top layer setup
- Open your 2D product template.
- In Product Options > Print click Edit on your print area.

- In Print Area Setup section, click Open Print Area Editor.

- Select Print area option.
- Activate the Add a top layer checkbox.
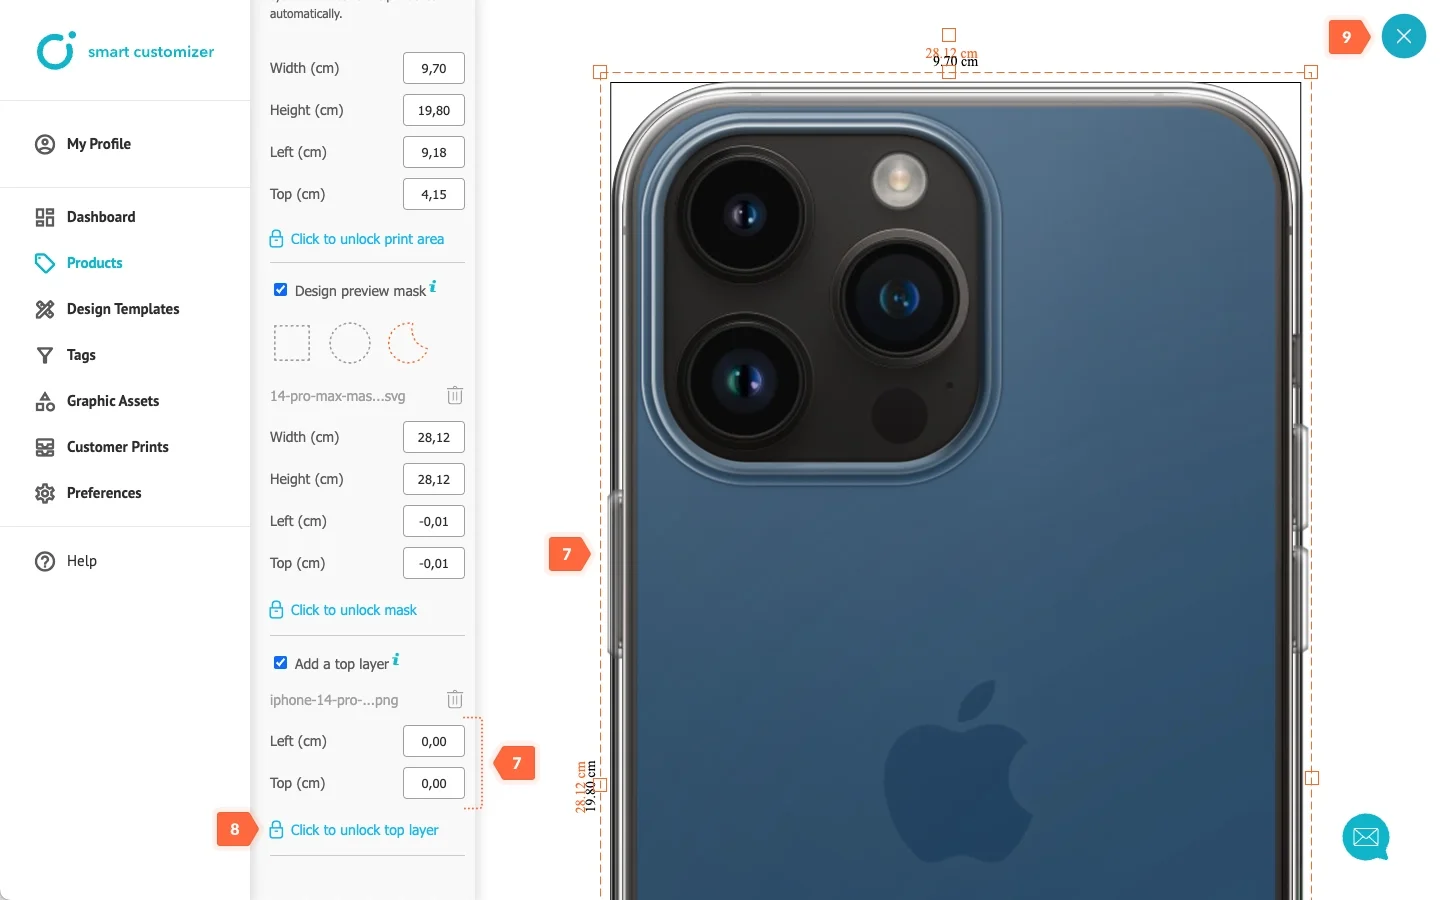
- Upload your custom top layer in .png file format. Top layer mask can’t be resized after the upload, therefore, make sure the .png image is in the correct size measurements.
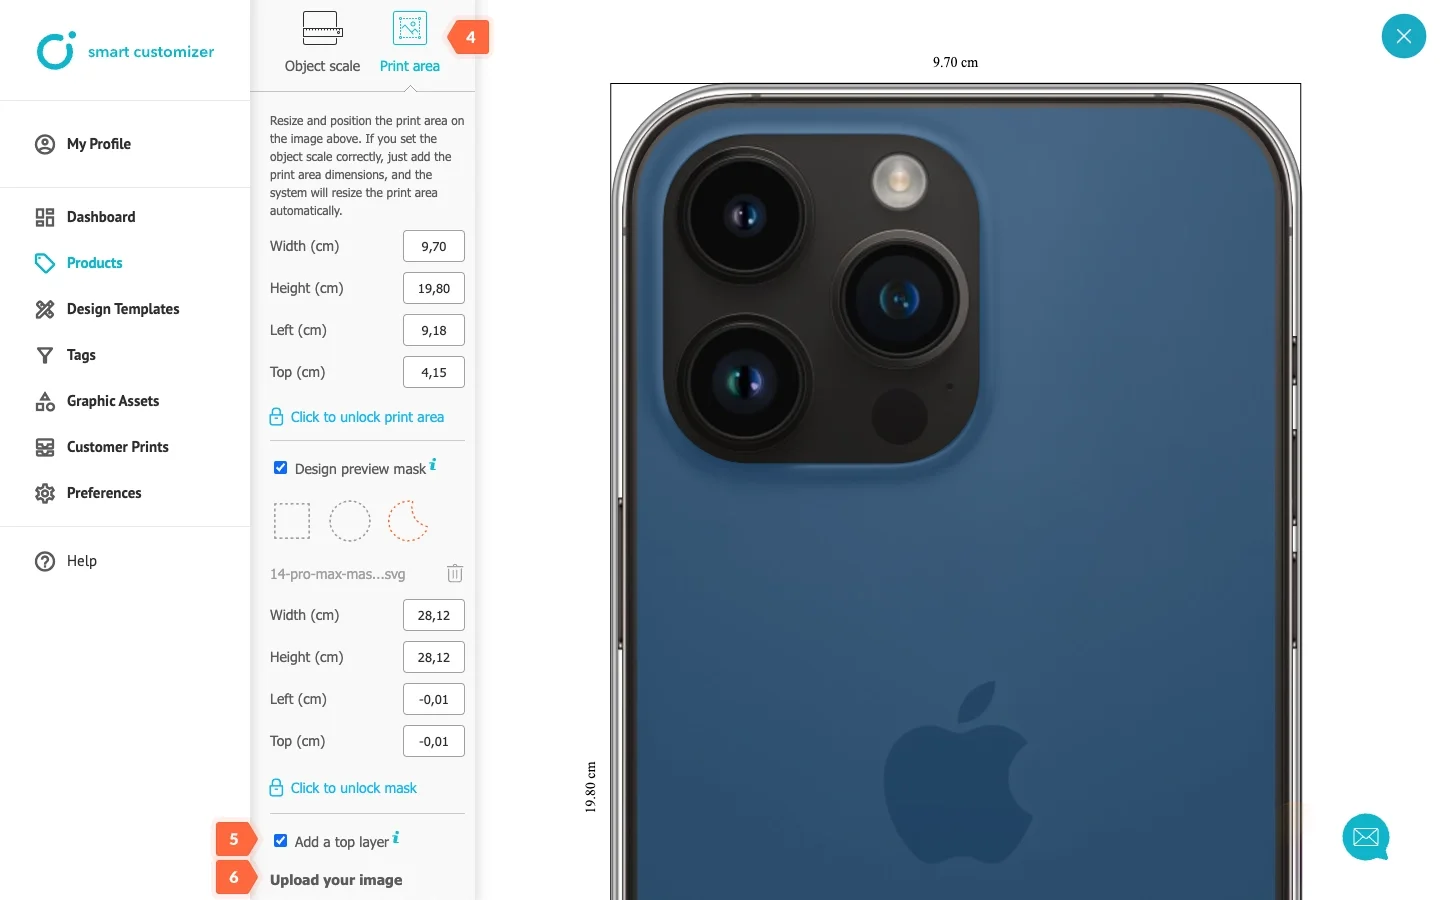
- Place the Top layer mask into the correct position for the preview mode.
- Once done, Lock Top layer in order to avoid accidental movement.
- Click on the exit icon.
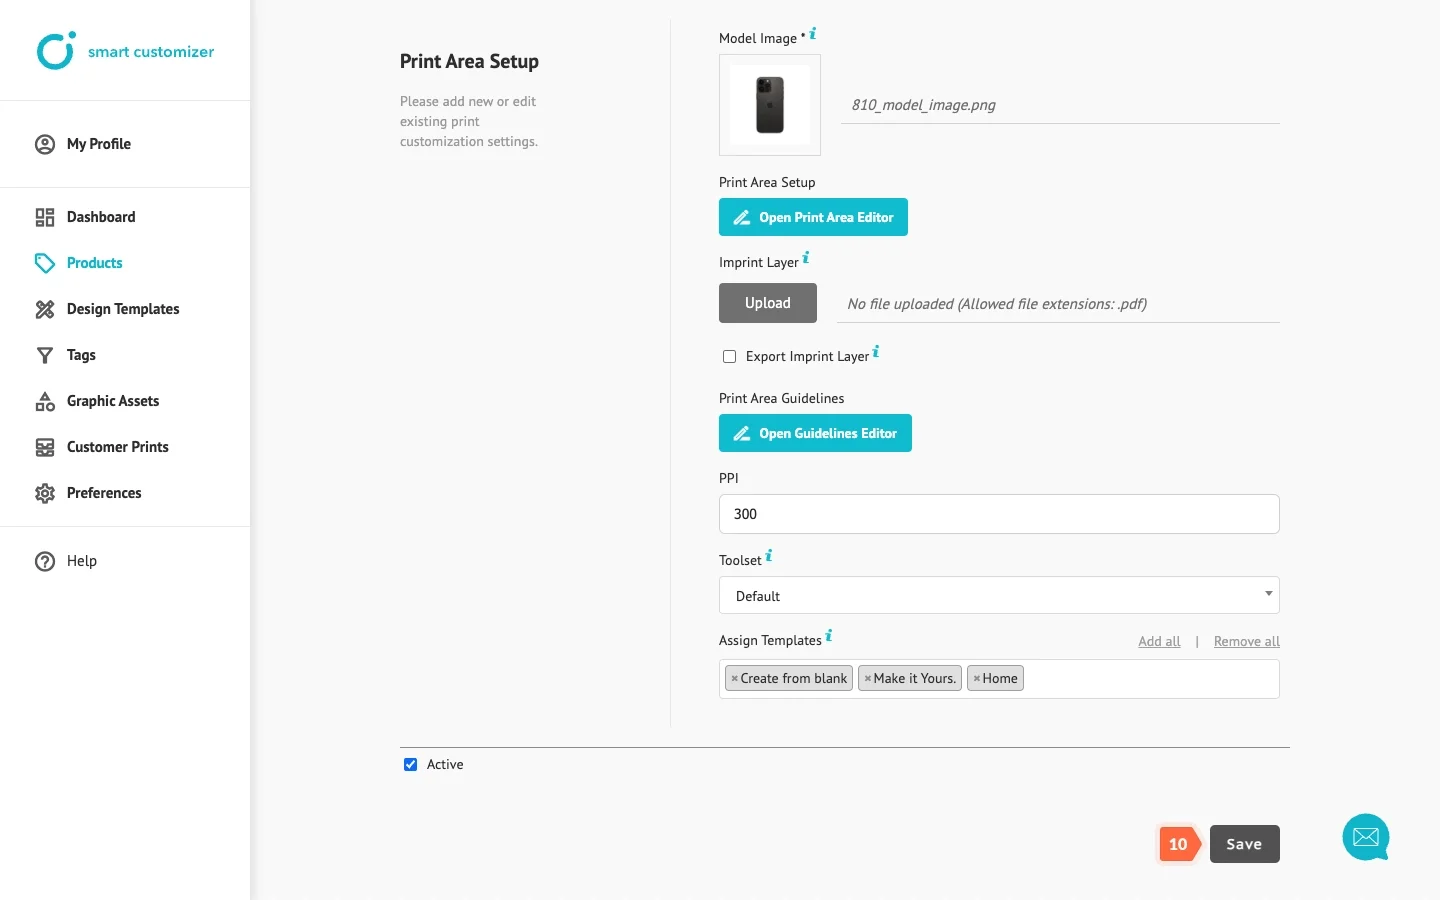
- Scroll down to the bottom of the page to Save changes.
This is a comparison showing how the design appears with and without the top layer:
