Creating toolsets
This article refers to Smart Customizer Web to Print App Version 2.0Explore the Version 1.0 article here
About toolsets
- Toolset is a set of predefined app features that can be managed by shop owners individually.
- You can add and remove as many toolsets as you want. There is only one default toolset that comes together with a Smart Customizer app installation.
- Each product template (and each print area) can have a different toolset assigned.
How to create a custom toolset?
- Go to Preferences and click on Add new toolset.

- Add a Title for your toolset.
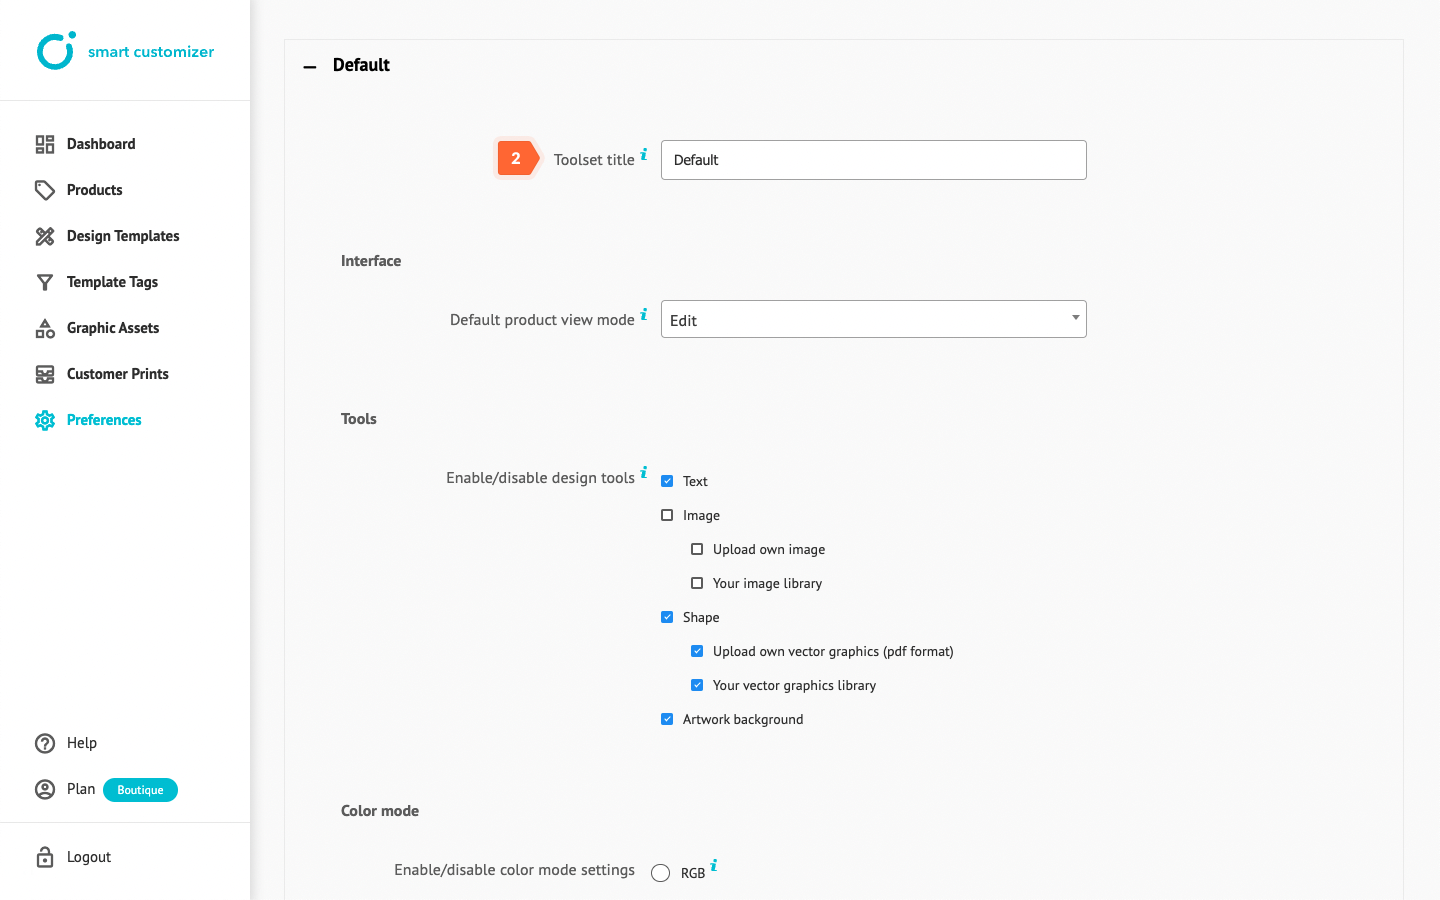
- Choose product preview Interface from a dropdown: Edit, Preview or Quick Mode. Learn more about each of the interface modes here: Default Product View Interface Modes.

- Tools. Enable or disable custom checkboxes that determine how much freedom you want to give the user while creating a design:
- For example, you want to allow inserting texts without the possibility to upload images or vector graphics. In that case, you would need to deselect the Image and Shape checkboxes with their inner elements.
- Or there might be a case where you want to allow customers to use only your graphic library (images and / or vector graphics). In that case, you would need to activate Image > Your Image library and Shape > Your vectors graphic library.

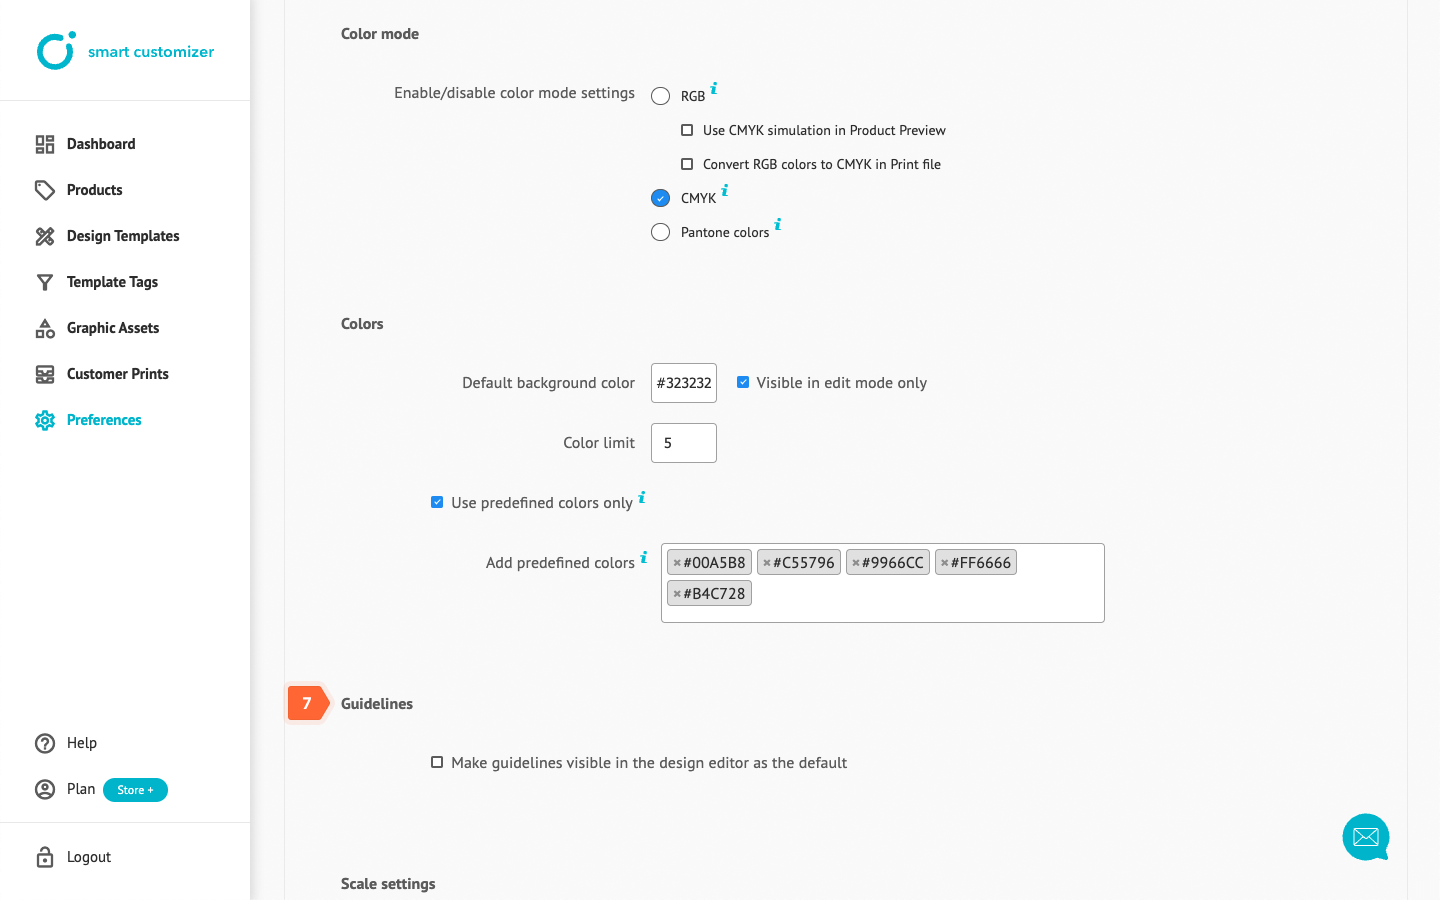
- Color mode settings can help you create a realistic color perception. With particular color mode settings customers can understand better what final print colors will look like in the real world.
- RGB color mode is enabled as a default, which means that all uploaded graphic assets in the Design Editor, Product Preview, and Print file will be shown in RGB color format. If you want a customer to see more realistic colors you can use CMYK color simulation in product Preview and/or Design editor.
- If you choose the CMYK color format, you will enable CMYK color conversion in the Design Editor, Product preview, and final print files. Meaning that all colors of the print will be automatically converted from RGB to CMYK.
- With the Pantone colors option enabled you will be able to upload Pantone coated graphics as well as choose different colors from the Pantone palette for uploaded graphic assets in the Design Editor. All non-Pantone coated vector graphics, except images, will be automatically recolored in random Pantone colors.
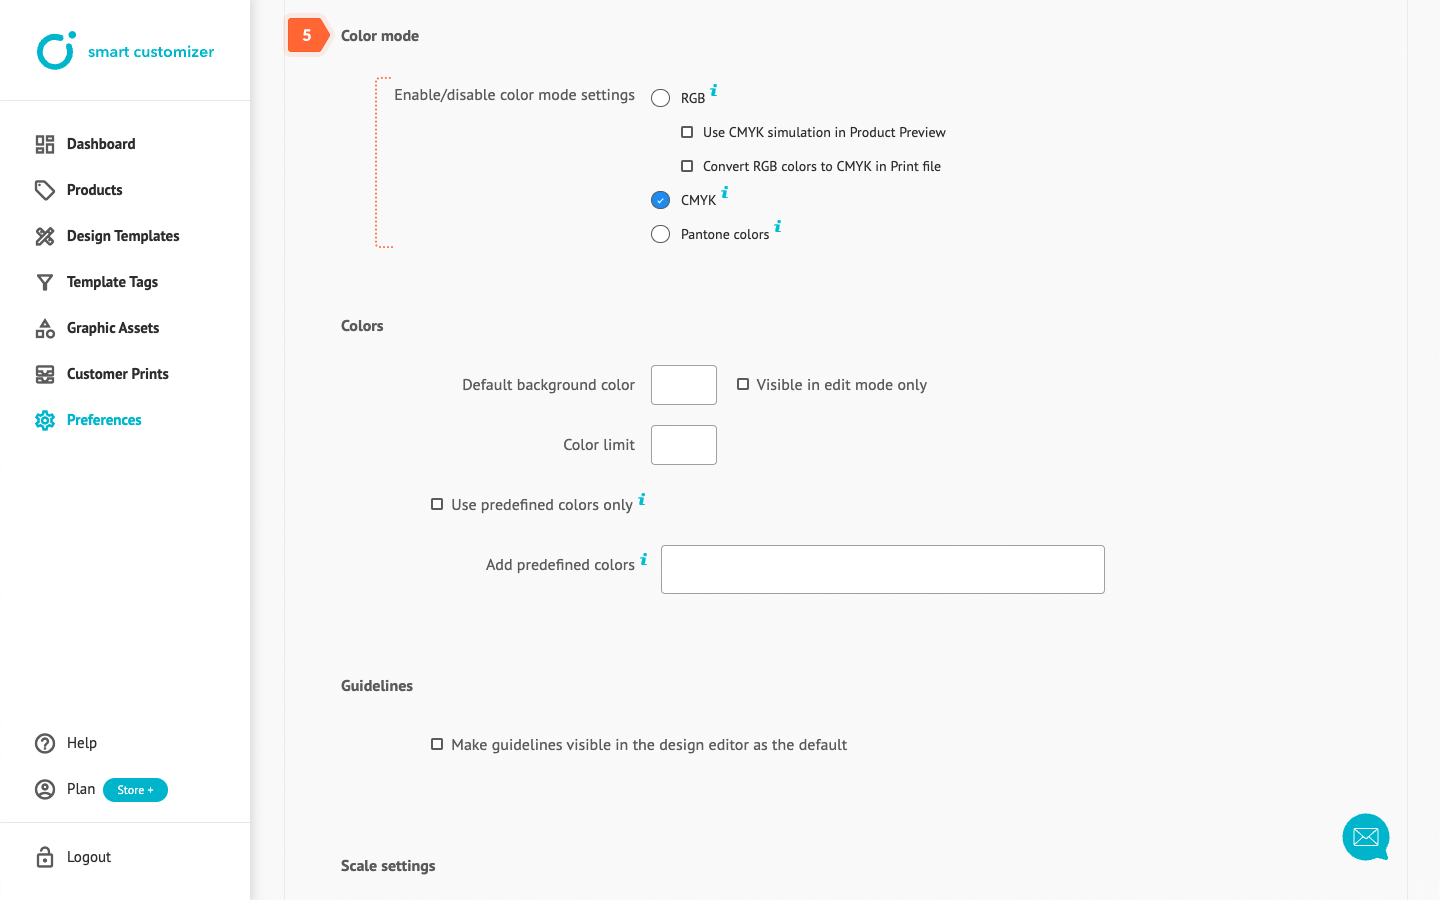
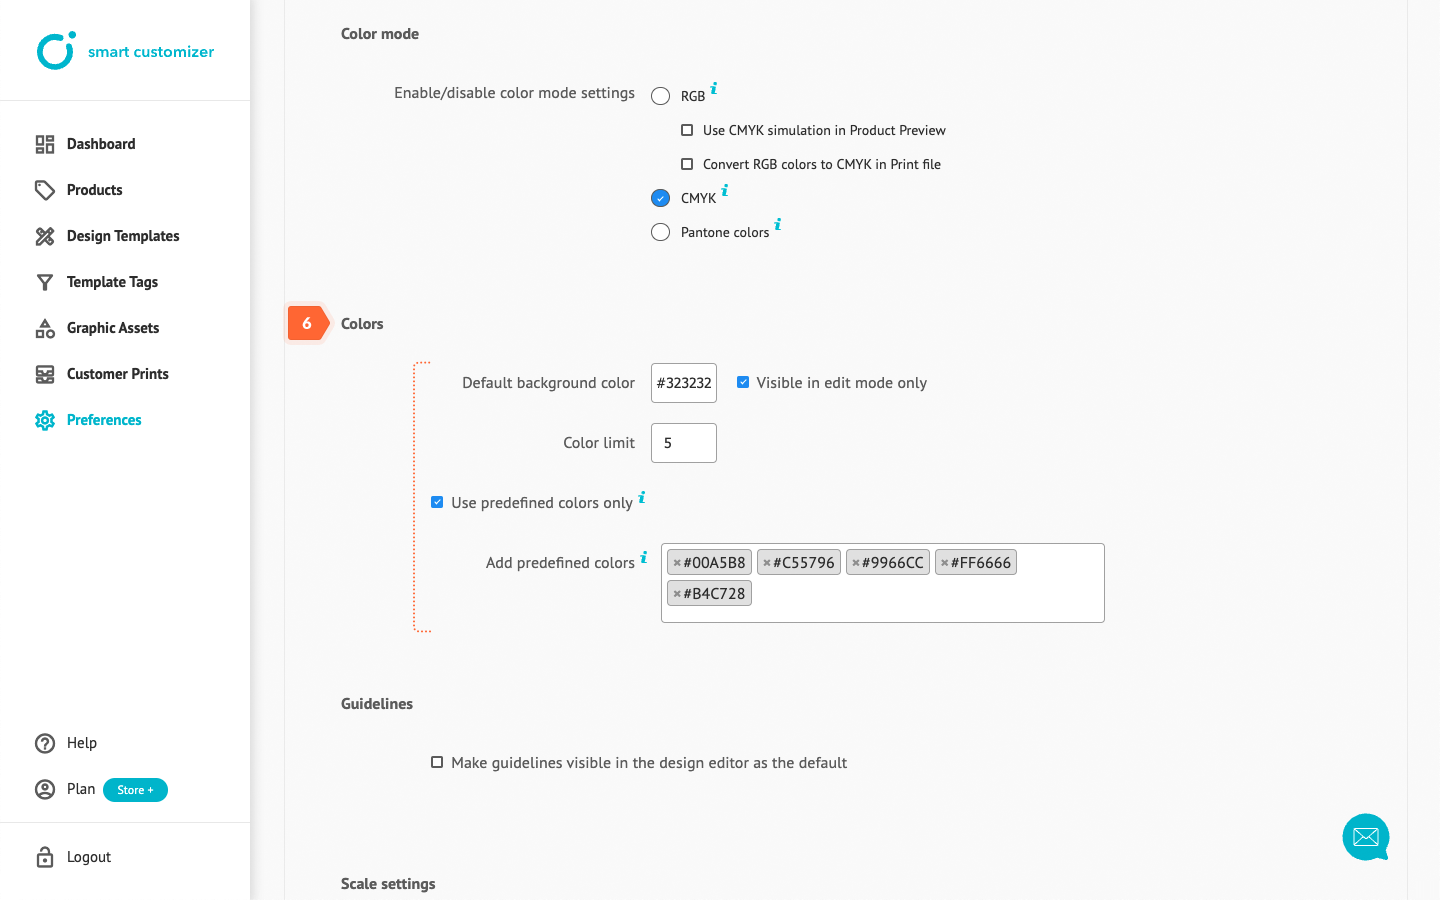
- Colors. You can set a default background color and make it visible in edit mode only. Additionally, you can limit a number of colors that can be used in the design template creation by setting a value (number) in Color limit input. There is also an option to use predefined colors only. To do that, activate Use predefined colors only checkbox and enter HEX codes in the Add predefined colors input.
- Guidelines. You can activate or deactivate default guidelines visibility in the design editor. If guidelines are visible as a default - the end user will not be able to turn them off in the Design Editor. Learn more about safe print area guidelines.
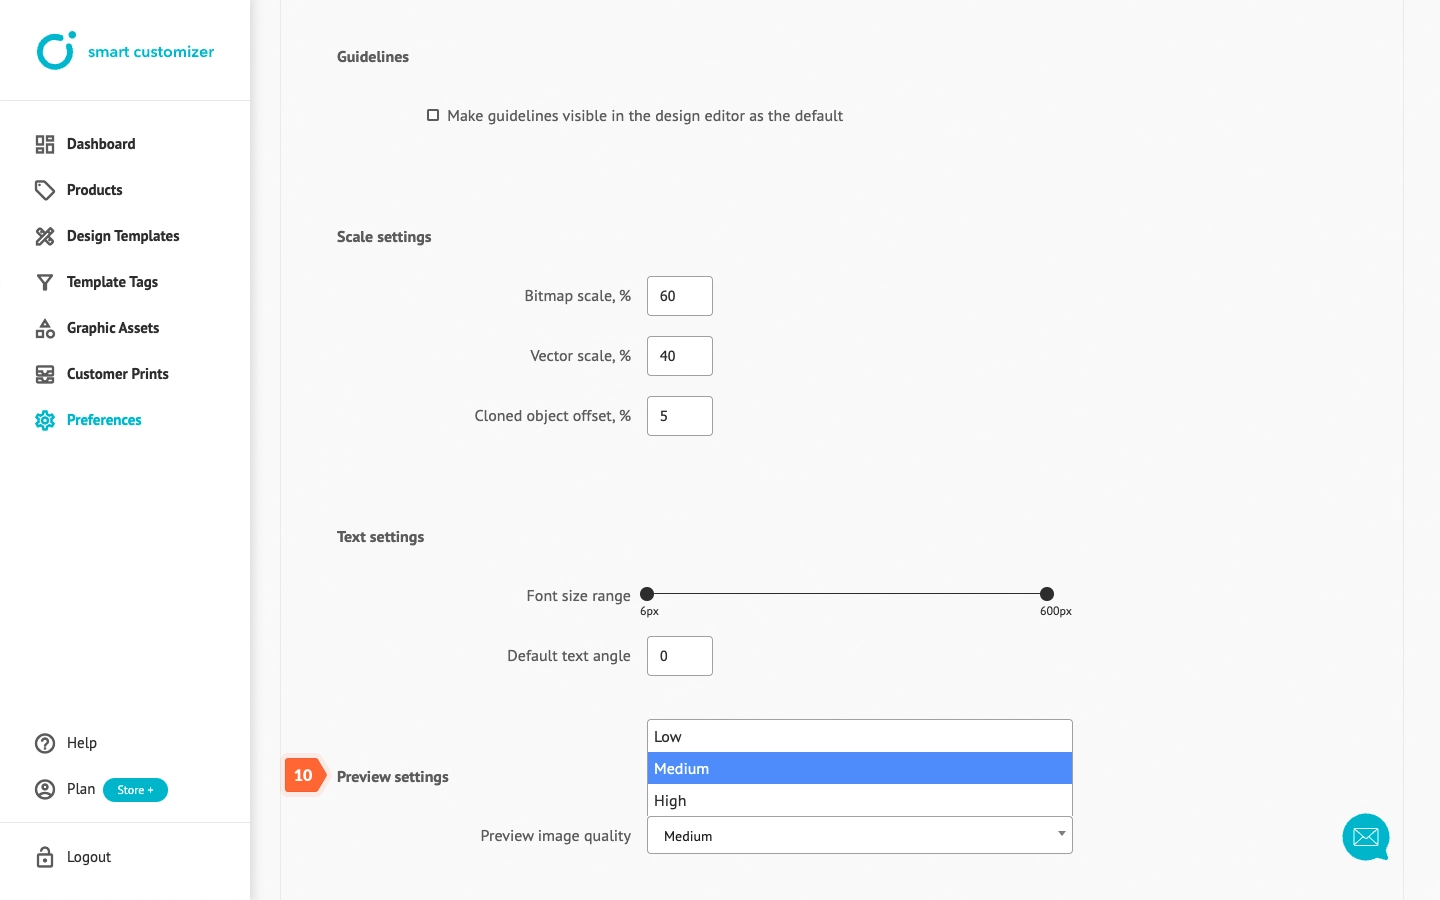
- Scale settings define how your image Bitmap scale, or ector graphic Vector scale will be displayed in the artwork once you upload it.

- Text settings. You can also set a range of minimum and maximum font sizes that your customer will be able to use while creating a design with text and choose the default text box angle.

- Preview settings. Normal preview image quality is set as Default and is optimal for those who are looking for reasonable image generation speed and quality. However, if your top priority is speed in product preview, then you can choose the Low preview image quality option. The High option guarantees a superior preview quality but takes longer to bake a design in the product preview.
Note: it is not necessary to tweak each toolset parameter but if you do so, do not forget to Save the changes and assign newly created toolset to the product that needs those specific tool features enabled.
