Creating product variants in WooCommerce
This article refers to Smart Customizer Web to Print App Version 2.0
Creating product variations
- By default, you can add options like color, size, and other custom choices in the Smart Customizer product settings.
- However, in some cases, you may need to use WP WooCommerce product variations instead of SC product options. For example:
- If you need to track inventory levels.
- If the same product has different 3D models (e.g., square and rectangular pillows), requiring two SC product templates but a single WooCommerce product.
- If 2D product templates have visually different sizes and details (e.g., phone cases of different sizes), requiring different SC product templates but a single WooCommerce product.
- If you need to assign different SC product variations to WooCommerce product variants or different WooCommerce products for any reason.
- It is important to emphasize that product variations must be first created in WooCommerce store and only then – linked to particular product templates in the Smart Customizer app.
Adding product variants in your WooCommerce store
- Open the product you want to customize in WooCommerce.
- Add all the necessary product information like Title, Description, and product Images.

- In Product data, select Variable product.
- Click on Attributes and then Add new.
- Enter Name; it can be size, color, style, or others. Then enter Values and separate each value with |.
- Click on Save attributes.

- Select Variations and click Generate variations.
- To continue, click Add price.

- Input a price and then click on Add prices. This will apply the price to all variations.

- To set different pricing for products or edit other information, click on Edit and modify the details in the input fields.
- Click on Save changes. Repeat the same steps for other variants.

Linking product templates to WooCommerce variants
- Ensure you create a separate product template in our app for each variant in your Shopify store. For example, if you have two different 3D pillow models, you need two SC product templates. If you're unsure how to set up a product, please refer to our guide.
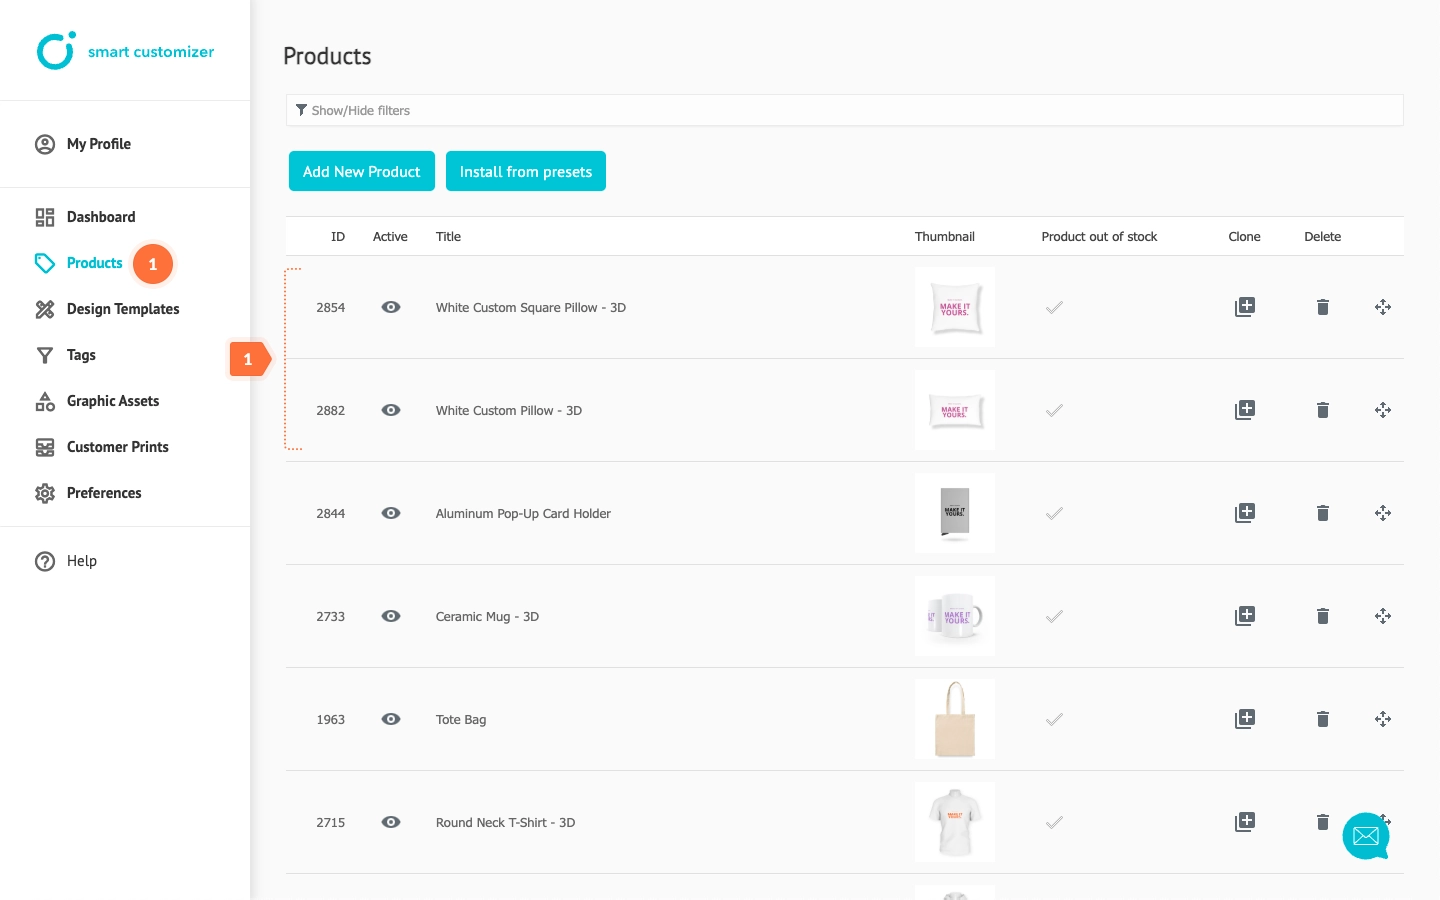
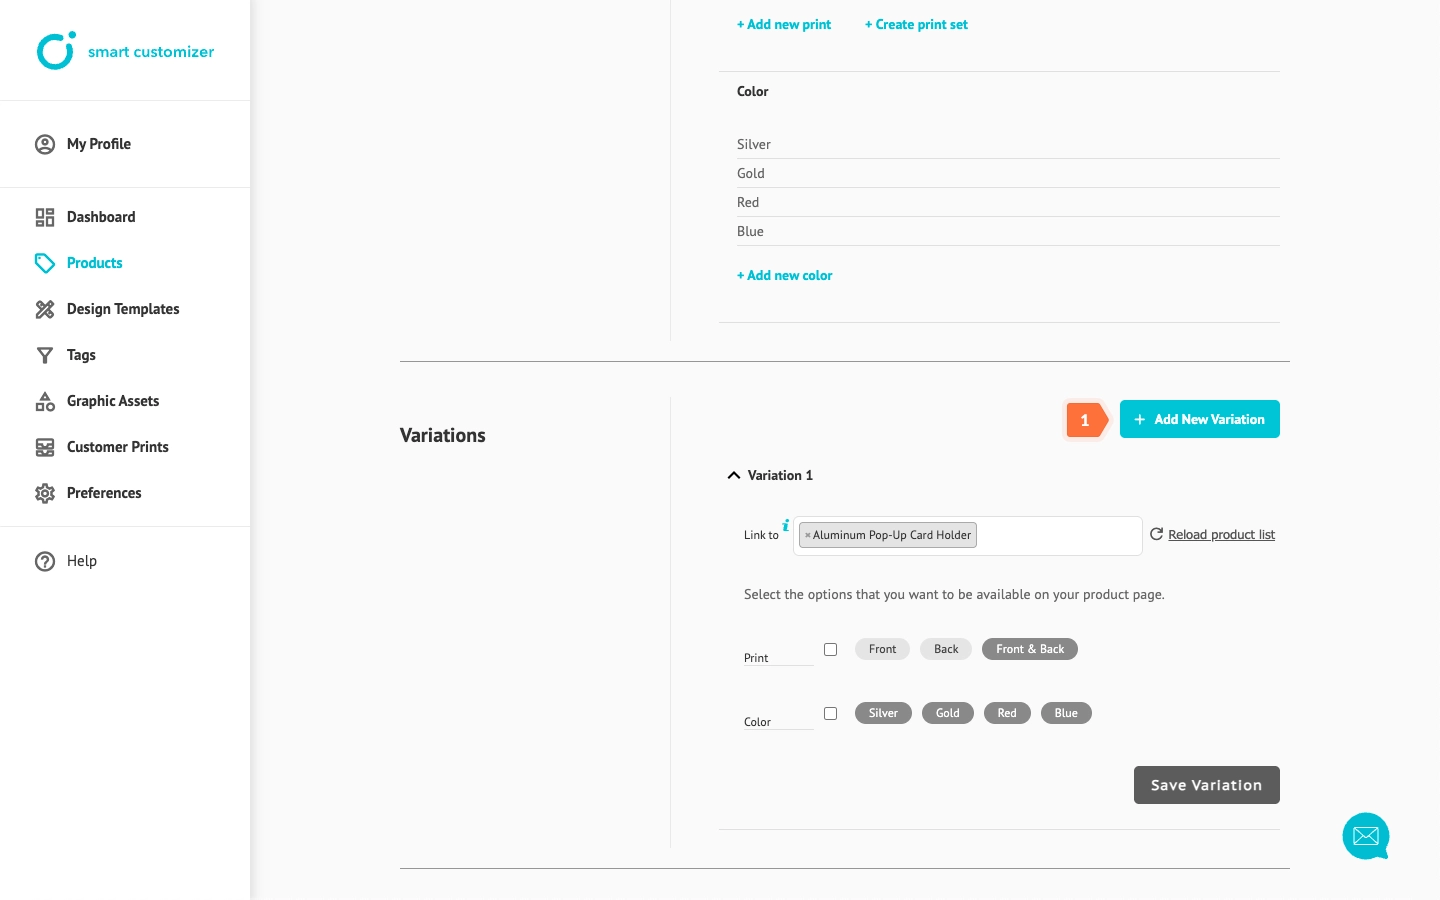
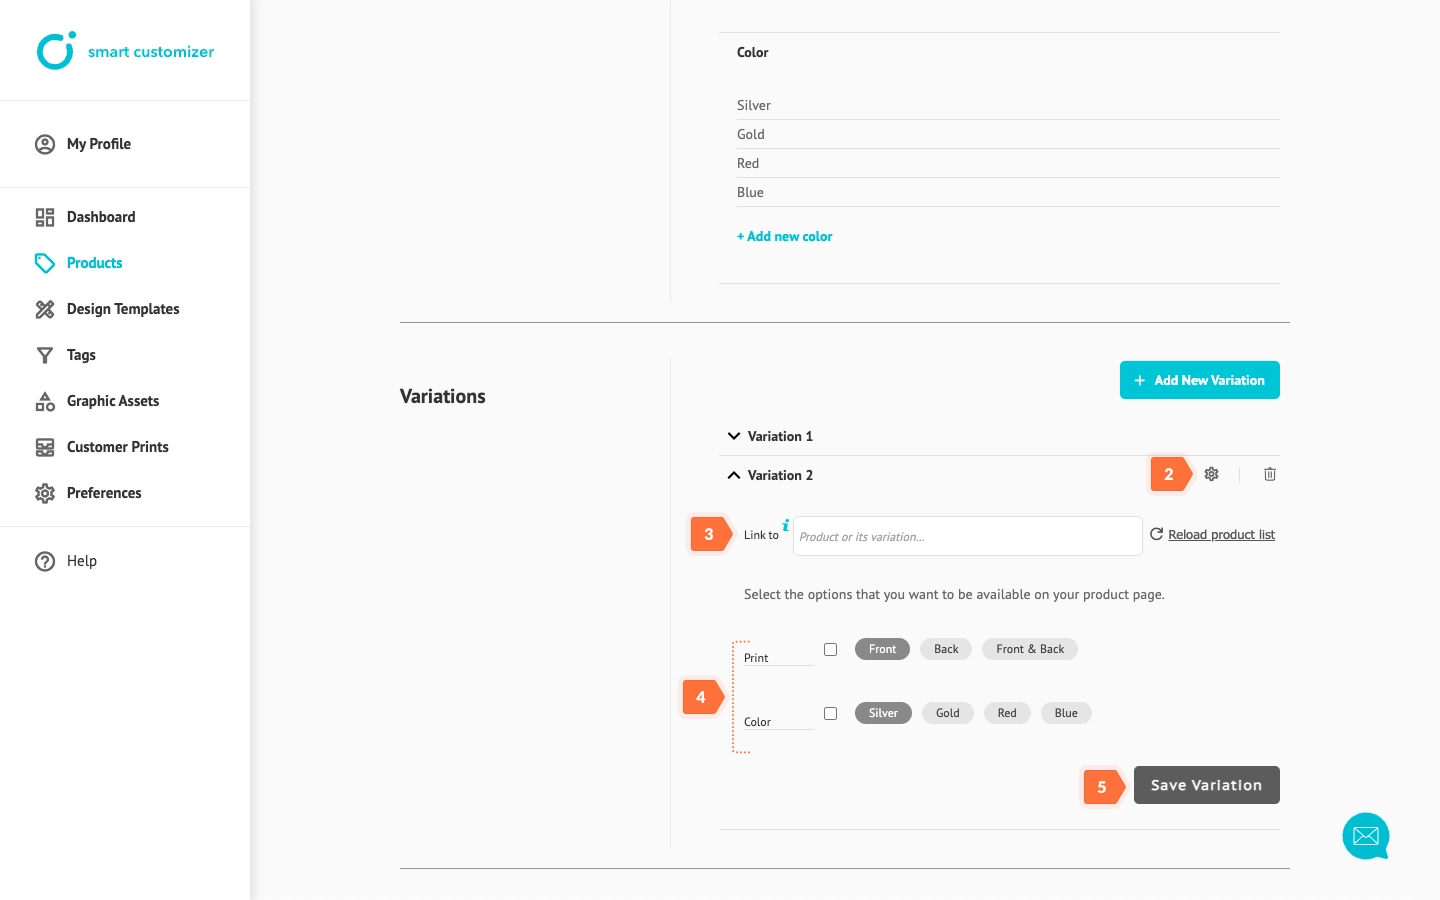
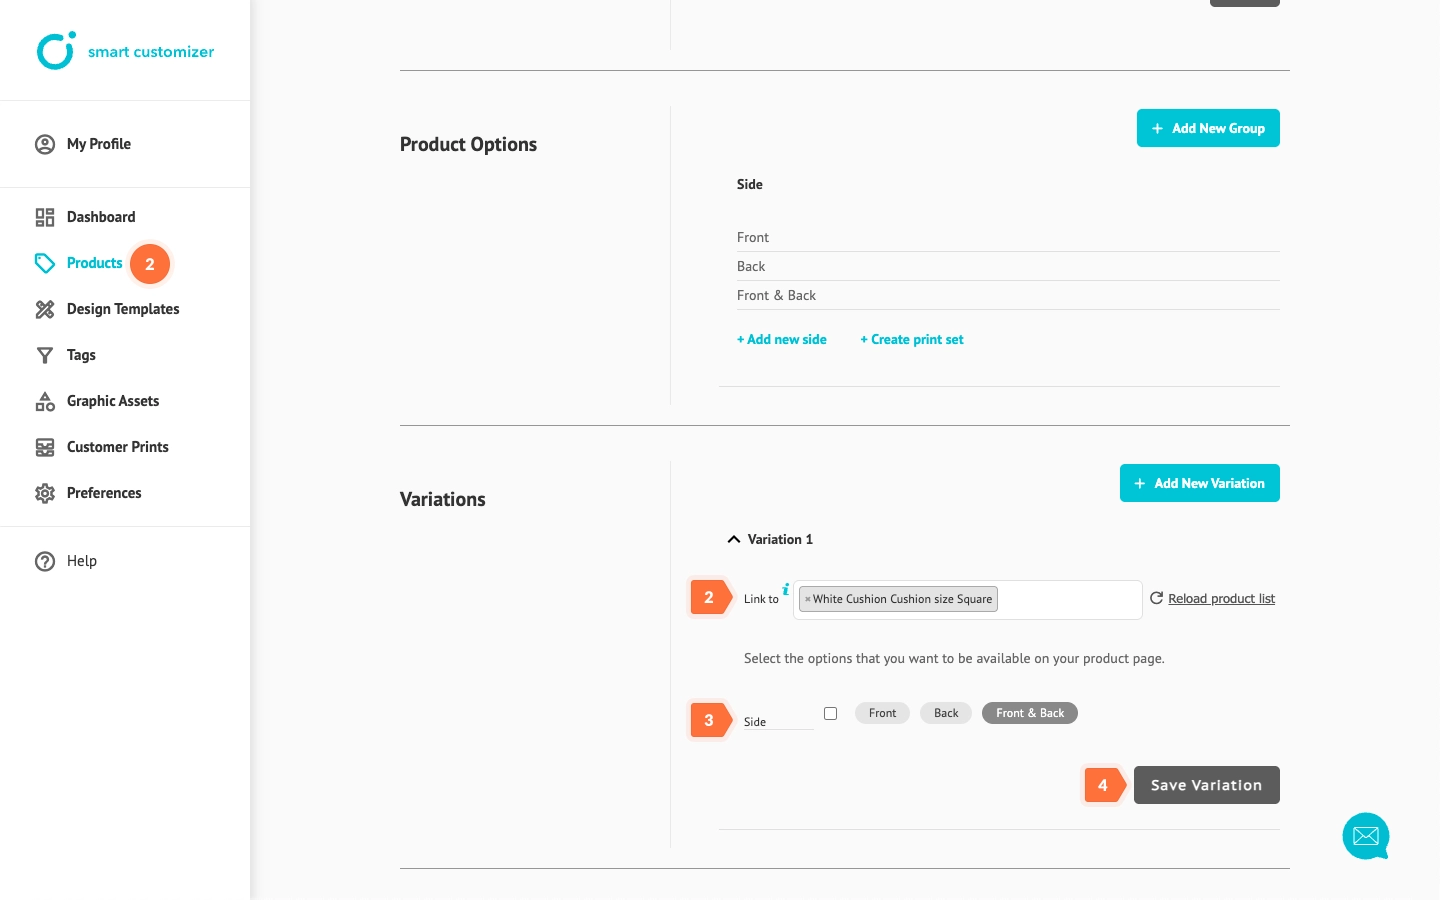
- Once you've set up your products, link each product template to its corresponding Shopify variant - open the Product template, go to the Variations section, and assign the appropriate variant.
- Choose the Product options you want to include.
- Click Save Variation.
- Check how the variants look in the front.

- If the Customize product button does not appear, please check the troubleshooting article or contact our support team.
Linking SC product variations to WooCommerce variants or products
Your SC product template can include as many variations as needed, each with different product options. You can assign each variation to a specific WooCommerce product variant or even a different WooCommerce product.
