Installing customizable products from presets in Stand-Alone
This article refers to Smart Customizer Web to Print App Version 1 Explore the Version 2 (Stand Alone) article here
About Stand-Alone products
- There are two possible ways to add a customizable product in our app: by installing our predefined product template or creating a product template from scratch.
- Stand-Alone customizable products differ from those on Shopify/WooCommerce in that they aren't linked to any store settings responsible for managing details like price and quantity information.
- Price and quantity information can be adjusted within the product settings and will be visible in the order form once customization is completed.
Basic installation
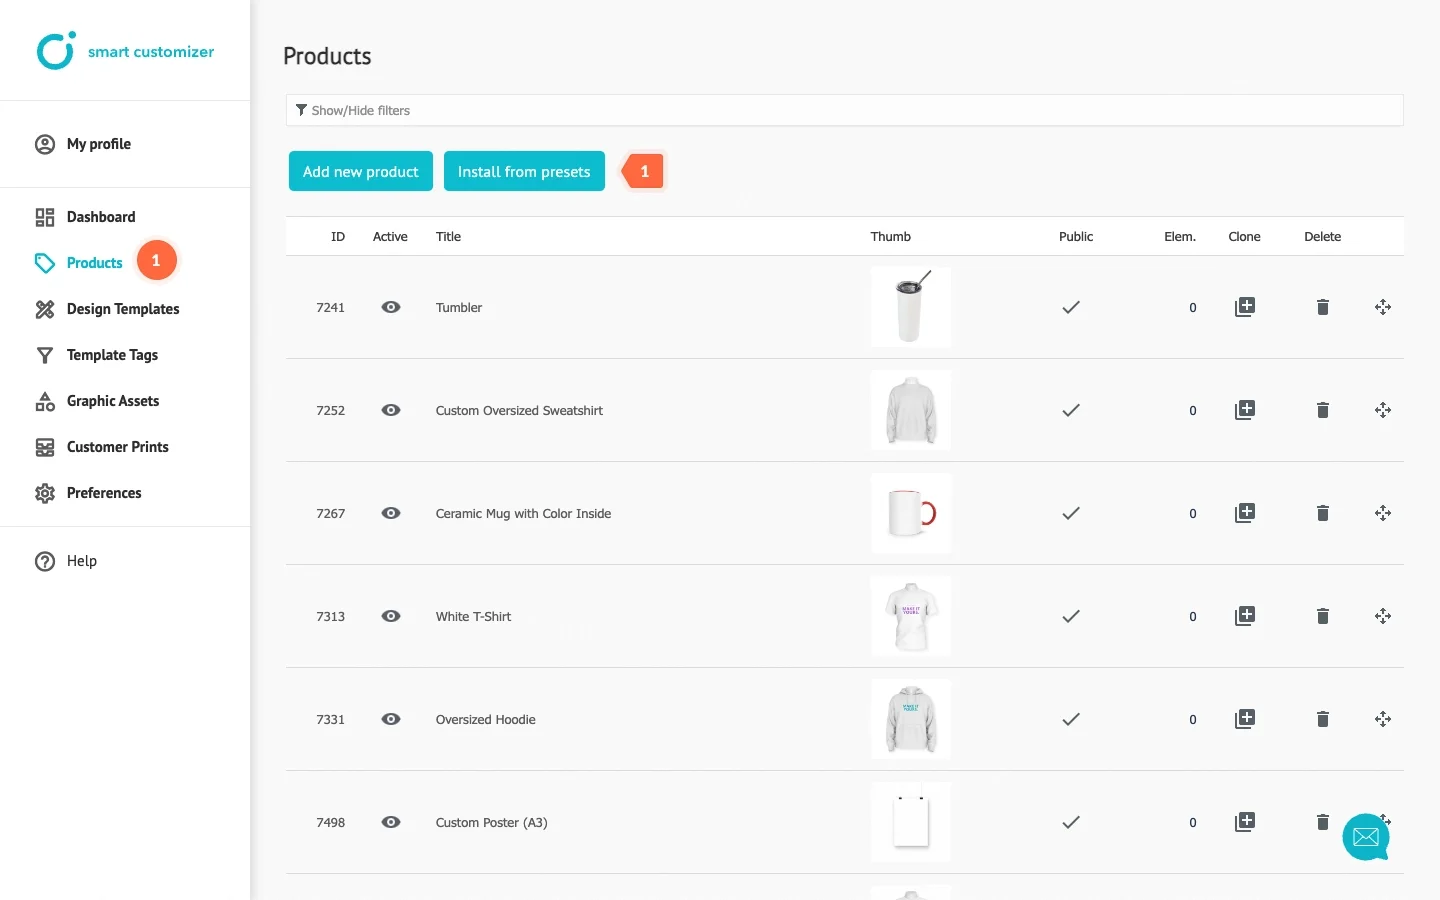
- Go to Products and click Install from presets.
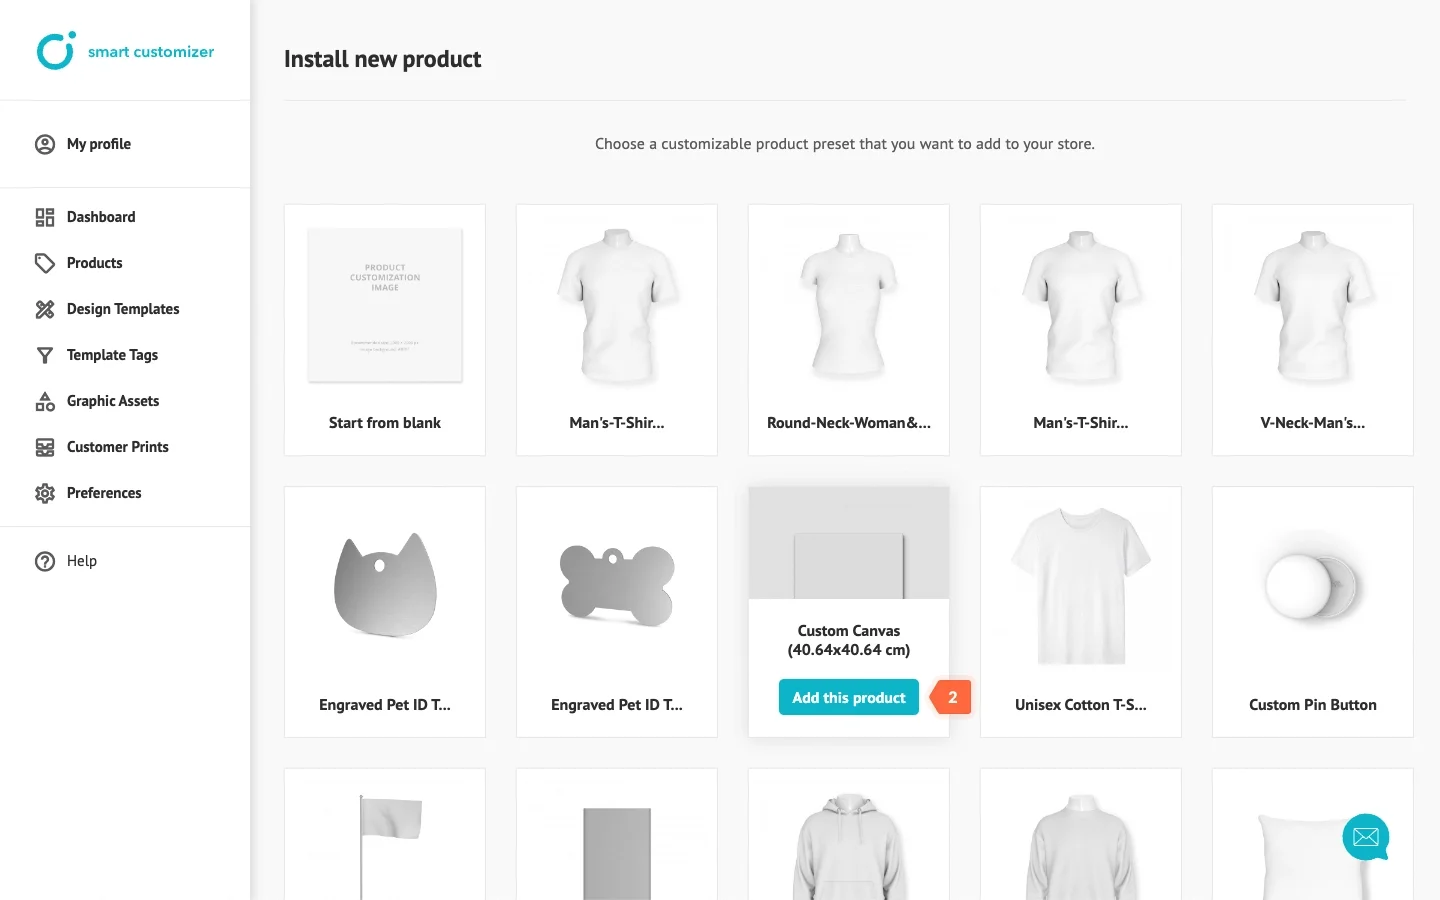
- Select the customizable product preset you wish to use, then click Add this product.
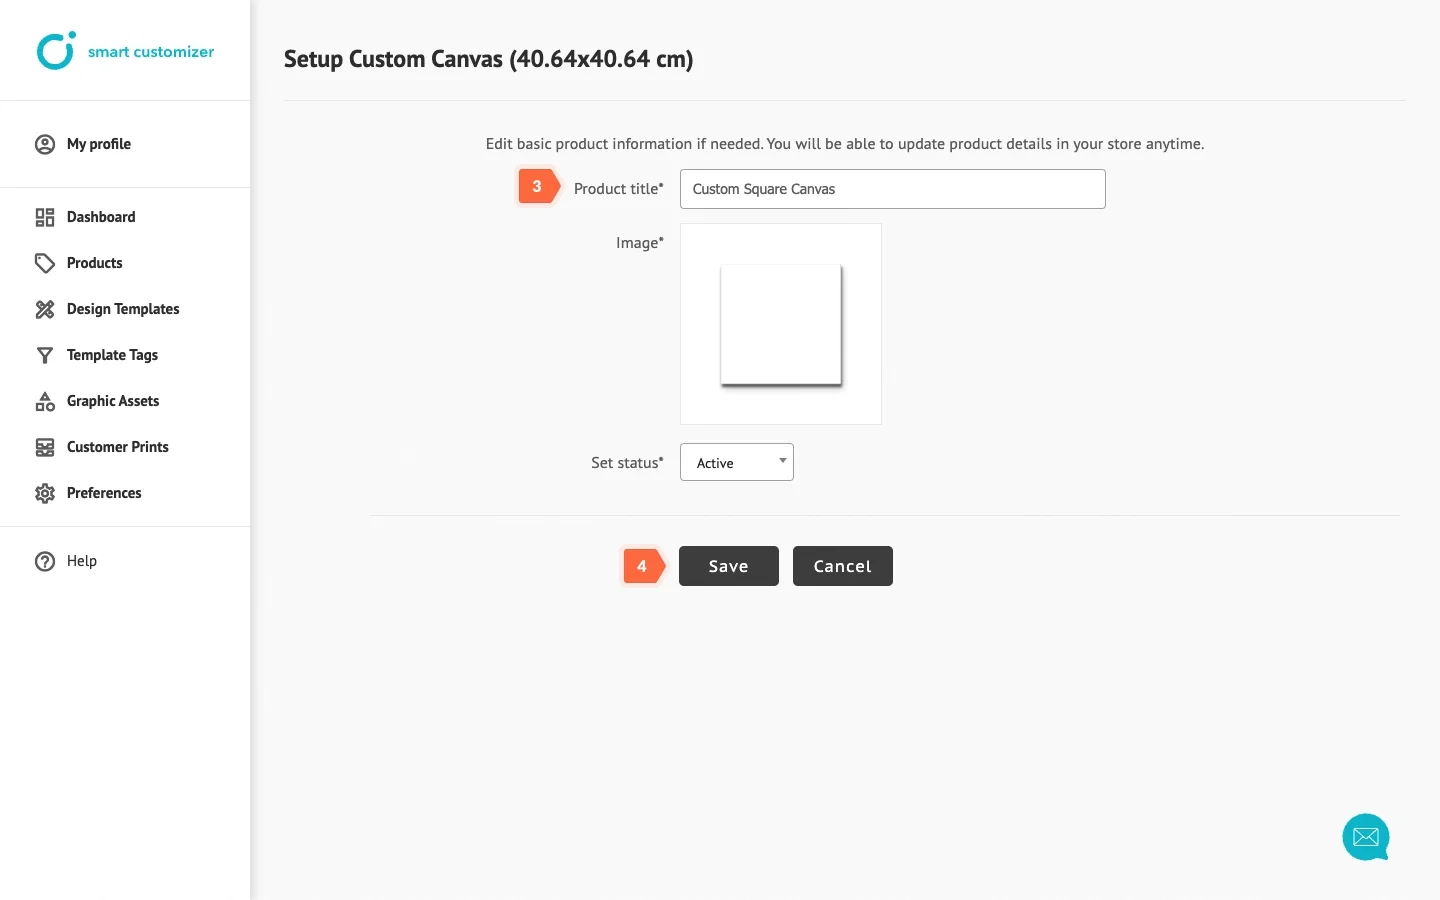
- Adjust the product Title; it will be visible on the URL front page.
- Save the changes.
- Click on Edit customization options to modify the template information.
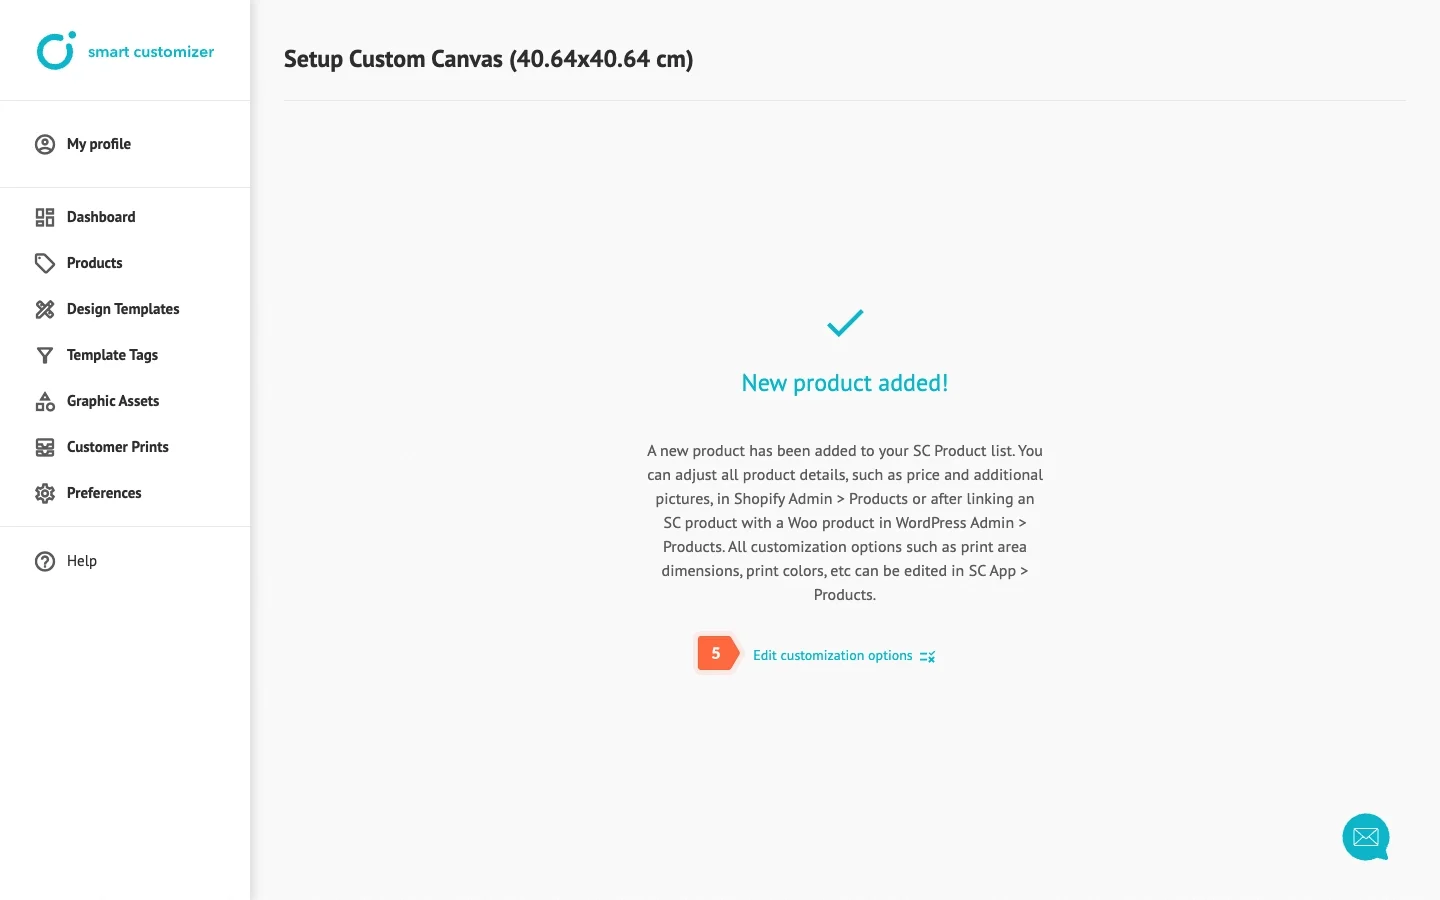
- Choose Product details. Adjust the description and specify the product price and quantity.
- Scroll down and click Save.
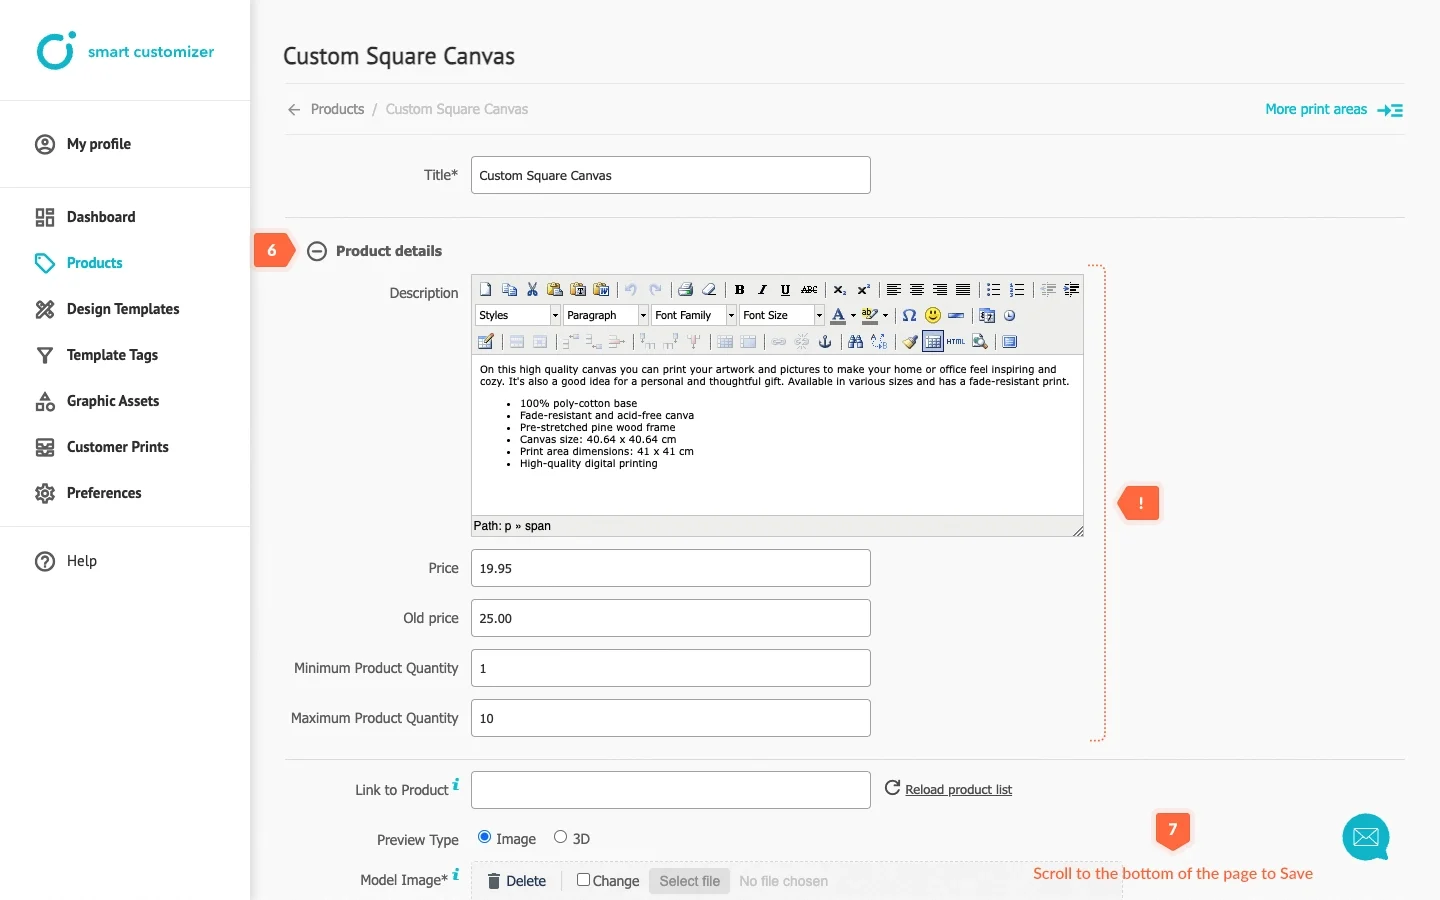
The product is ready for customization. You can either use it as a standalone link or embed it into your existing web page.
Additional options
To make your product even more special, you can:
- Create and assign design templates for an easier customization start.
- Use a guidelines layer - it is typically employed for print-related requirements or notes for customers to achieve the best design results.
- Add an imprint layer to include non-editable information like company logos, slogans, barcodes, or other details for a more realistic product appearance.
- Create a custom toolset where you can set the background color, choose customization tools, and more.
