Customizable elements for embed settings
This article refers to Smart Customizer Web to Print App Version 2.0
Embed settings
- If the Smart Customizer app is not working by default, you may need to adjust the Embed settings, which can be found in your admin Preferences.
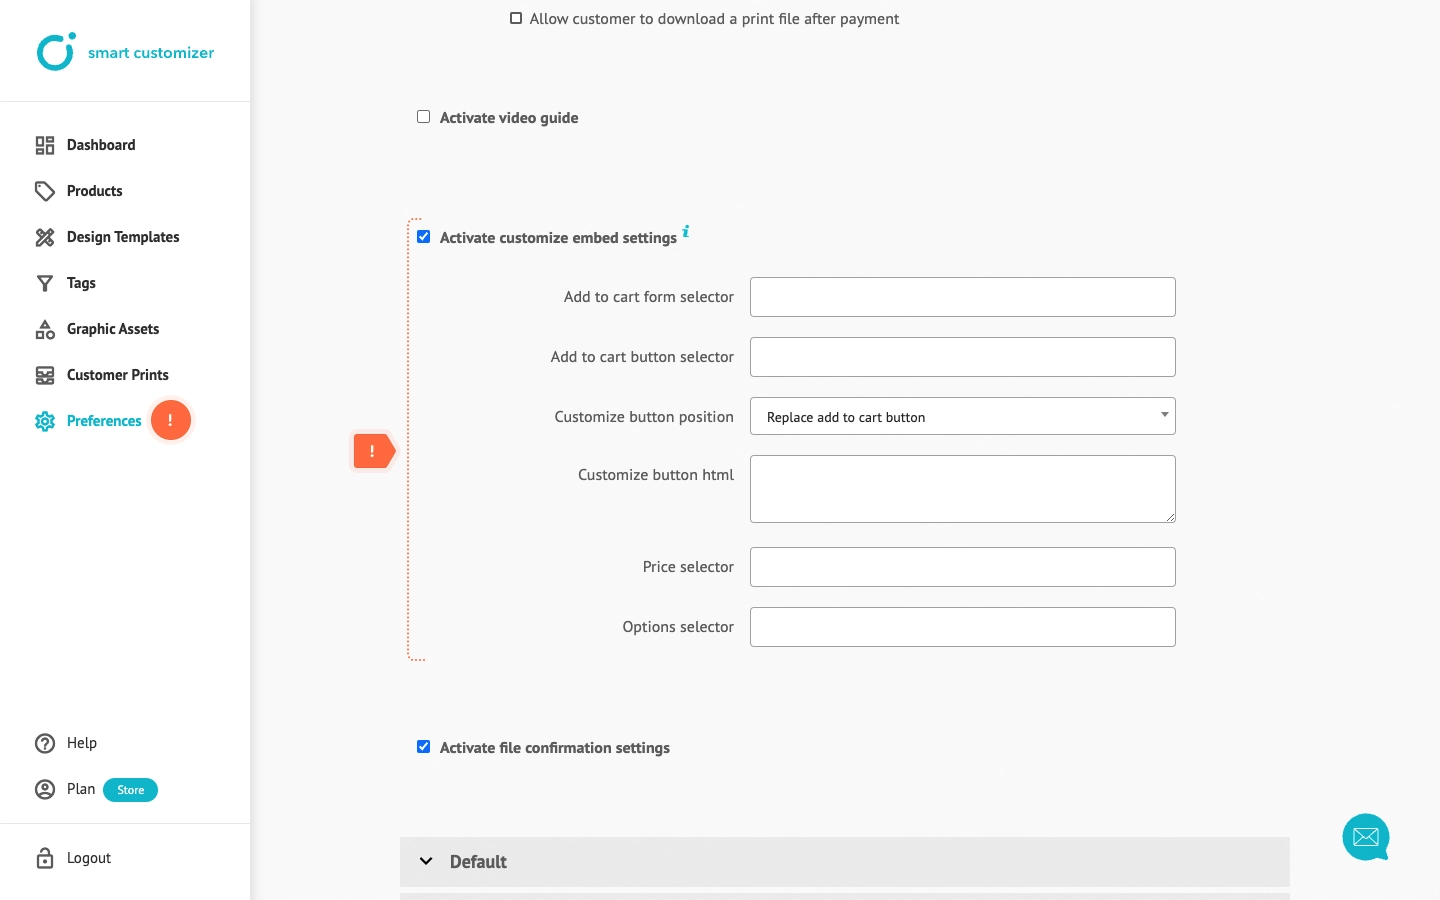
- You can find a description and use case for each selector in this article.
Add to cart button selector
The most common issue is that the Customize Product button does not appear on the product page. This is usually because the form element or the default Add to Cart button cannot be found by our app. You can typically resolve this by adjusting the Add to Cart Button Selector or Add to Cart Form Selector settings.
To manually define the page elements required by the Smart Customizer app:
-
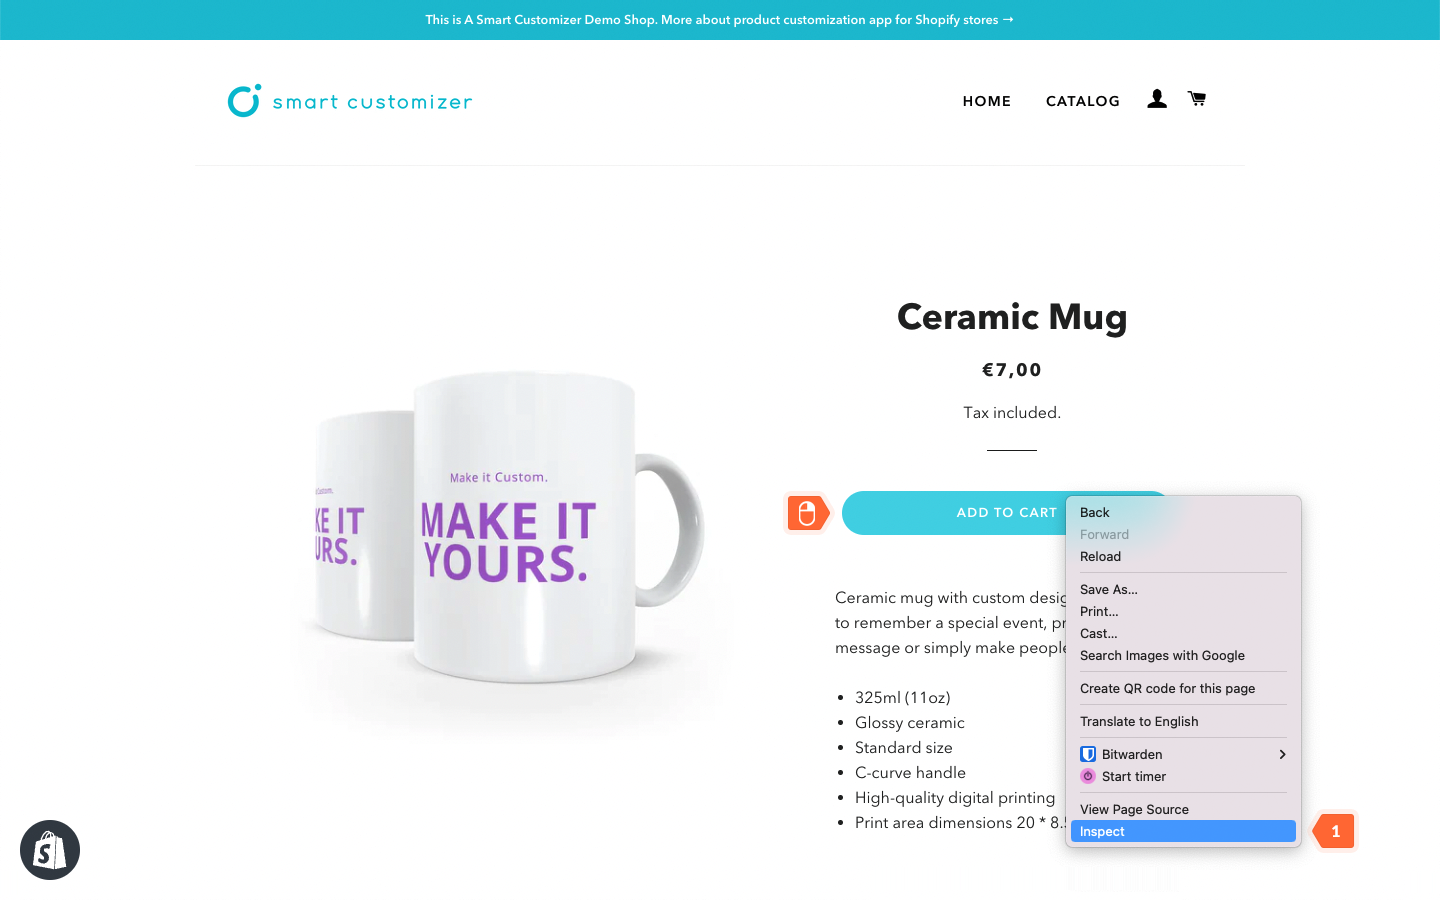
Open product page on your store. Place the mouse cursor on the Add to cart button and click once on the right mouse button. Select Inspect from the panel list.
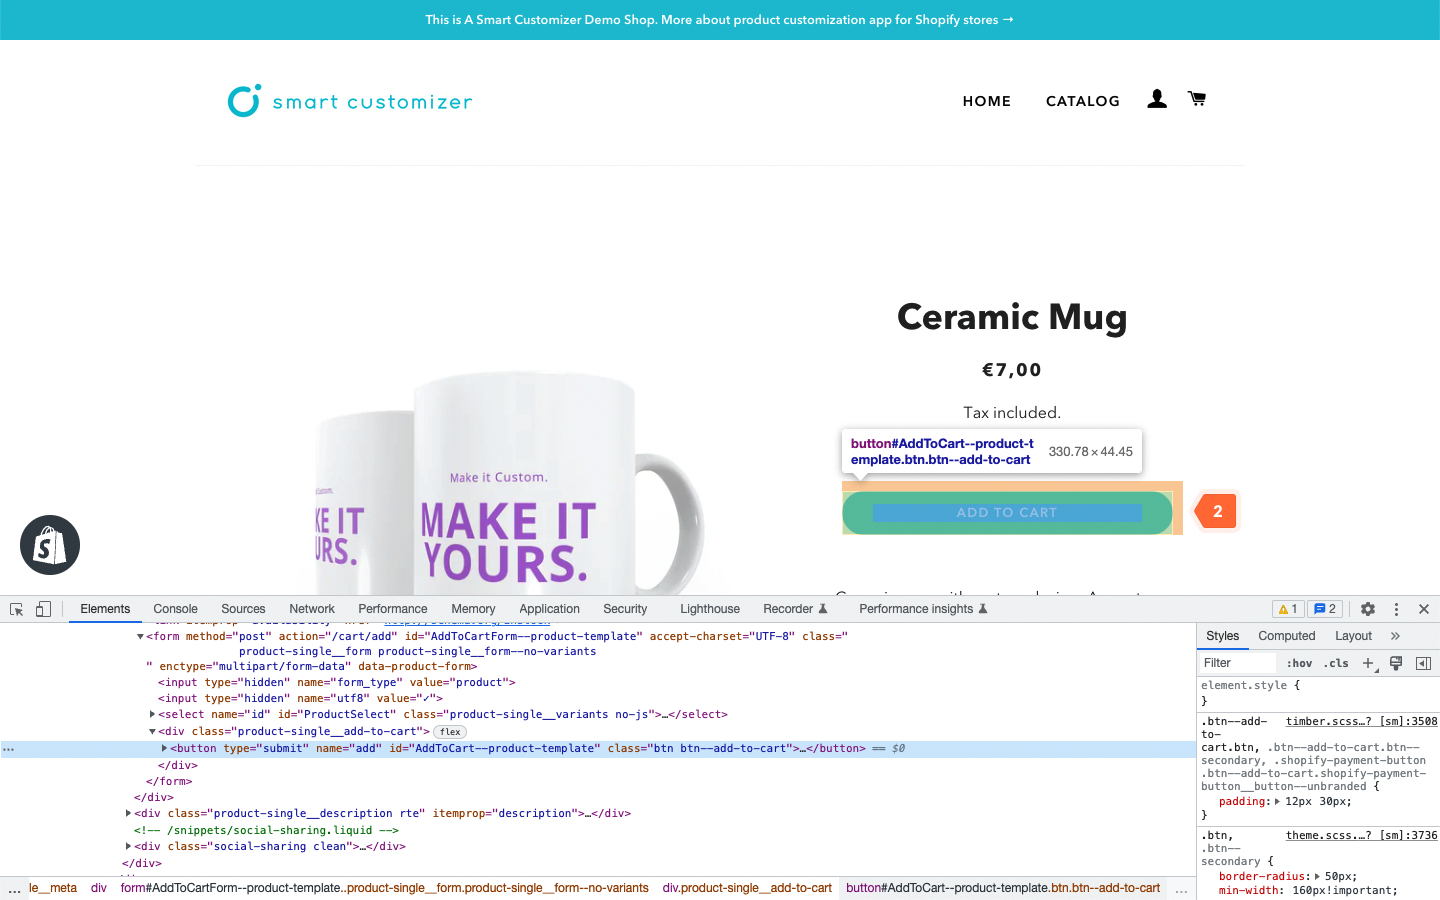
 Once the developer's console appears on your browser's screen, you will see the Elements tab open. Here you will find a highlighted line with the HTML code of an inspected element - in this case, it is the HTML code of the Add to the cart button.
 NOTE:
NOTE:- In some browsers or browser versions Inspect might be called as Inspect element.
- If you using Safari ensure that developer tools are enabled. How to do this check this article: Safari element inspect.
-
If the highlighted element on the page is not a button, please try to repeat the inspection again.
-
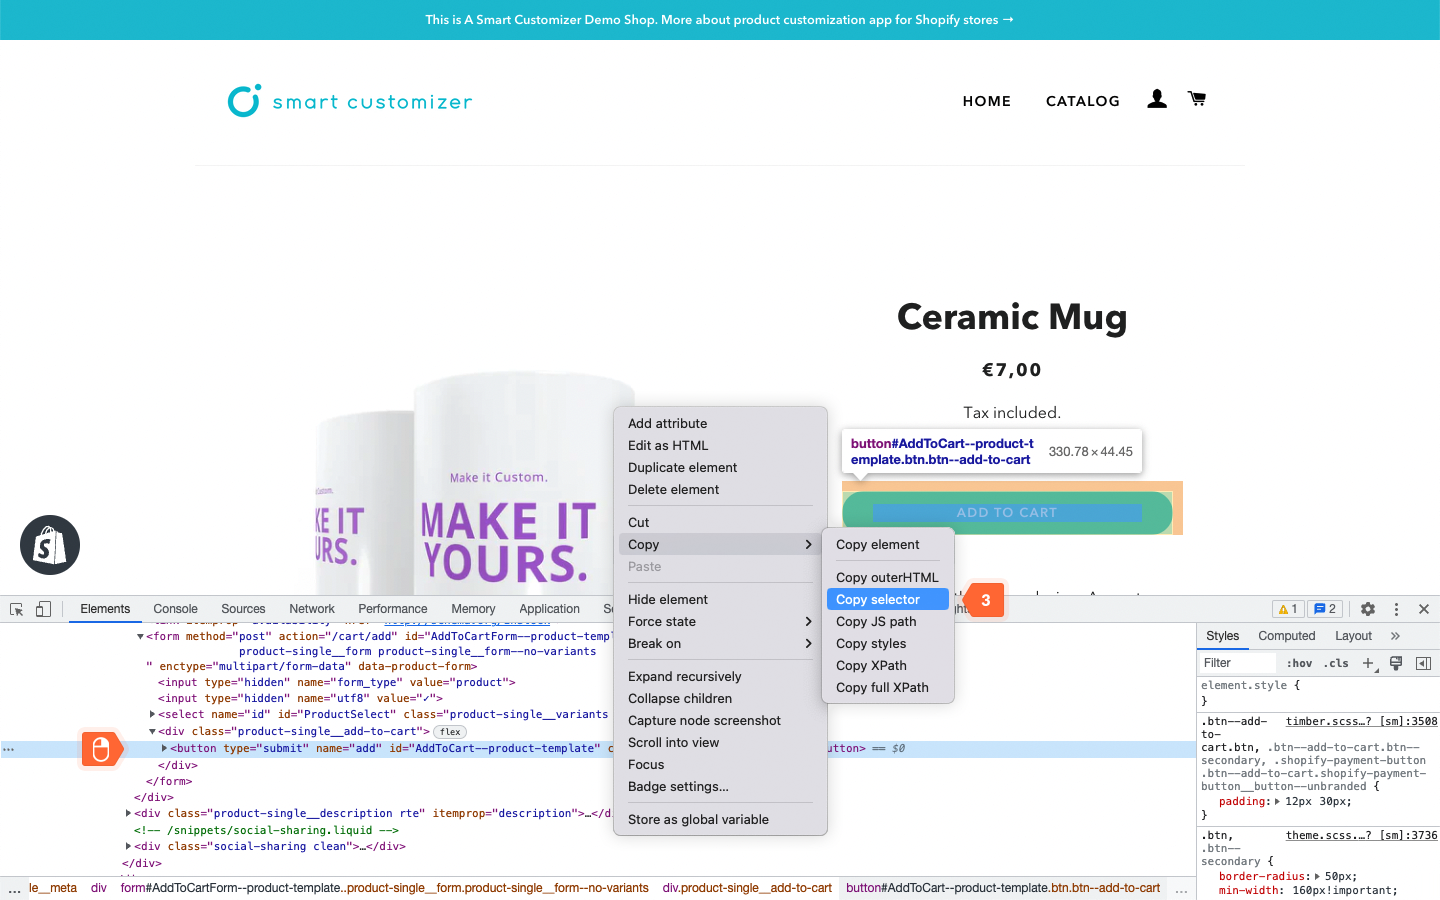
Click right mouse button on highlighted code line and select Copy > Copy Selector.
-
You should have a text (selector) copied in your clipboard. The text should look similarly to an example below: #product-form-template--15726930559033main > div > button.product-formsubmit.button.button--full-width.button--secondary
-
You will only need a short text segment with dots for further steps of selector style: button.product-form__submit.button.button--full-width.button--secondary
-
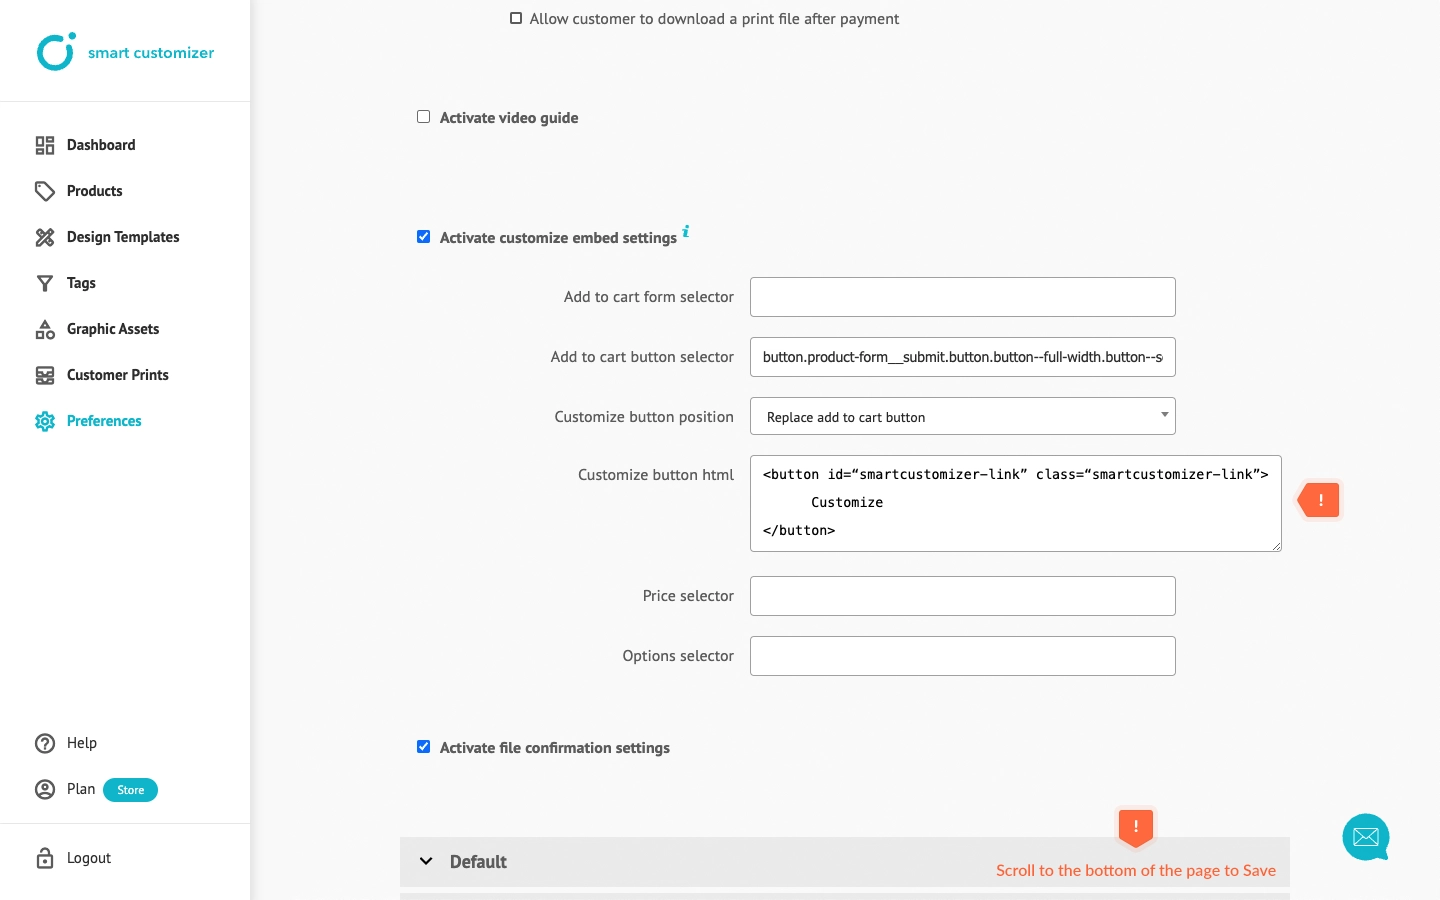
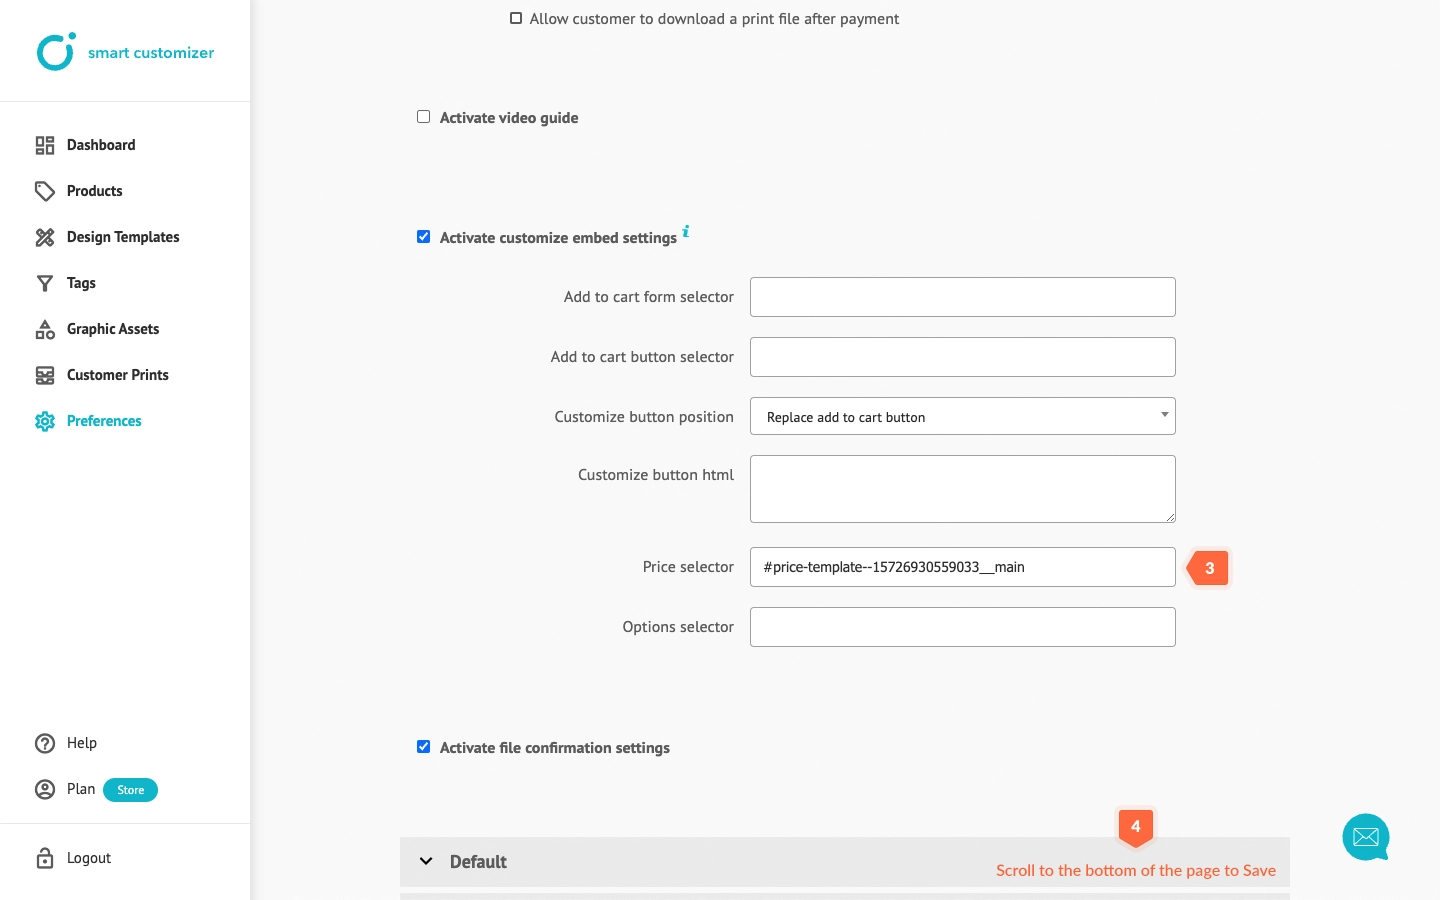
Open the Smart Customizer App, navigate to the Preferences page, scroll down and find the Activate customize embed settings option. Activate the checkbox and paste in what's in your clipboard - text (selector) code in the Add to cart button selector input field.
-
Scroll to the bottom of the page and Save the changes to take effect.
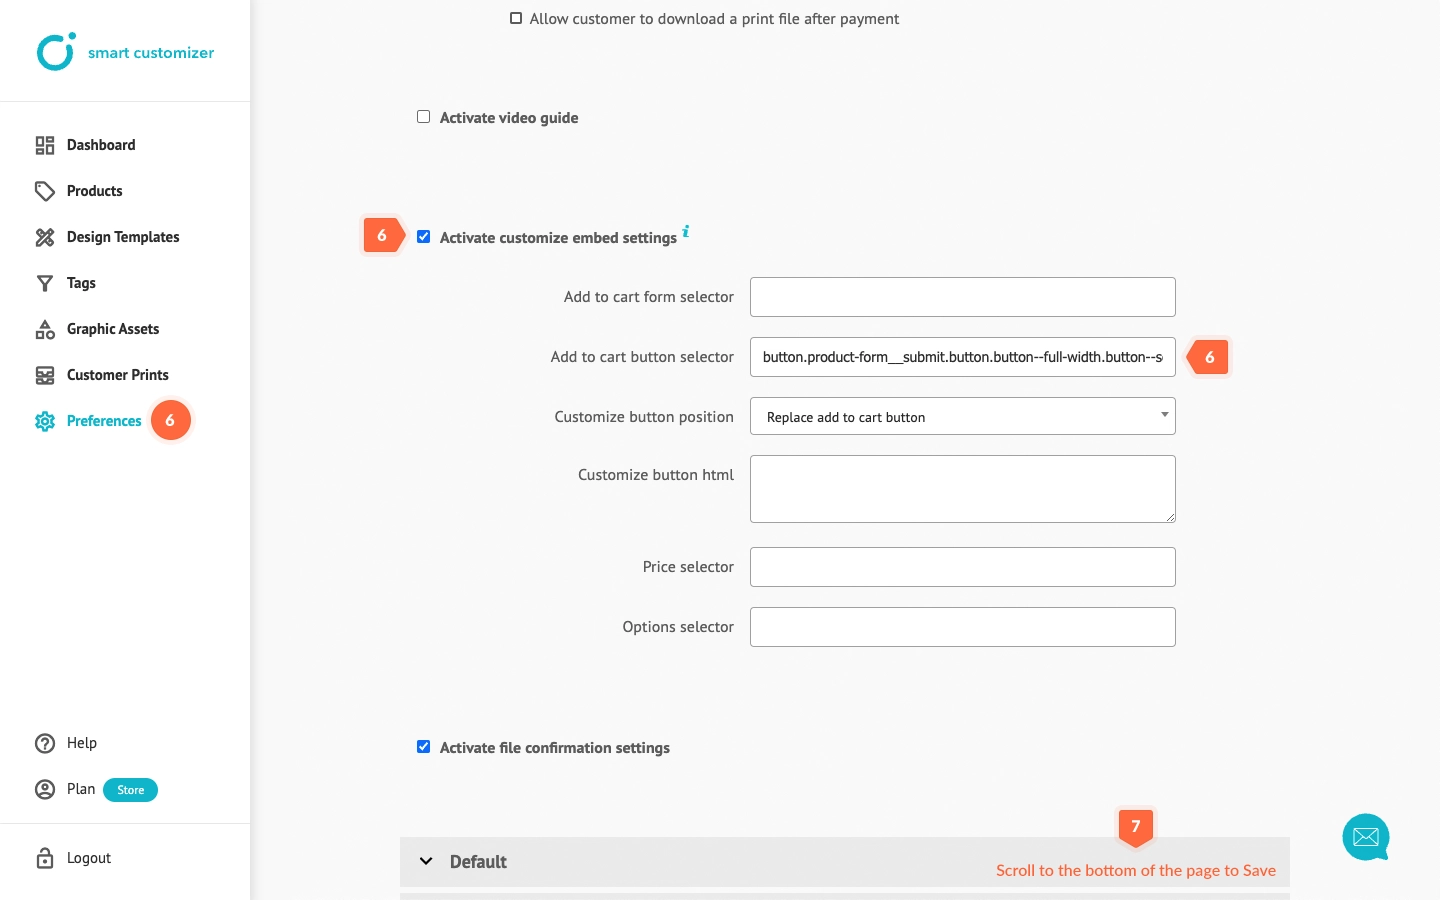
-
Go to the product page and refresh it. The button Customize should appear.
NOTE: All Shopify themes that use the Drawer shopping cart type are not compatible with Smart Customizer App.
Add to cart form selector
- In cases when page has two same Add to cart buttons (typically same buttons are placed in different forms and one is hidden), Add to cart form selector should be used as a helper to define in which form to look for the Add to cart button.
- Since this scenario depends on custom Shopify theme settings, please contact our support team if you need assistance.
Customize button position
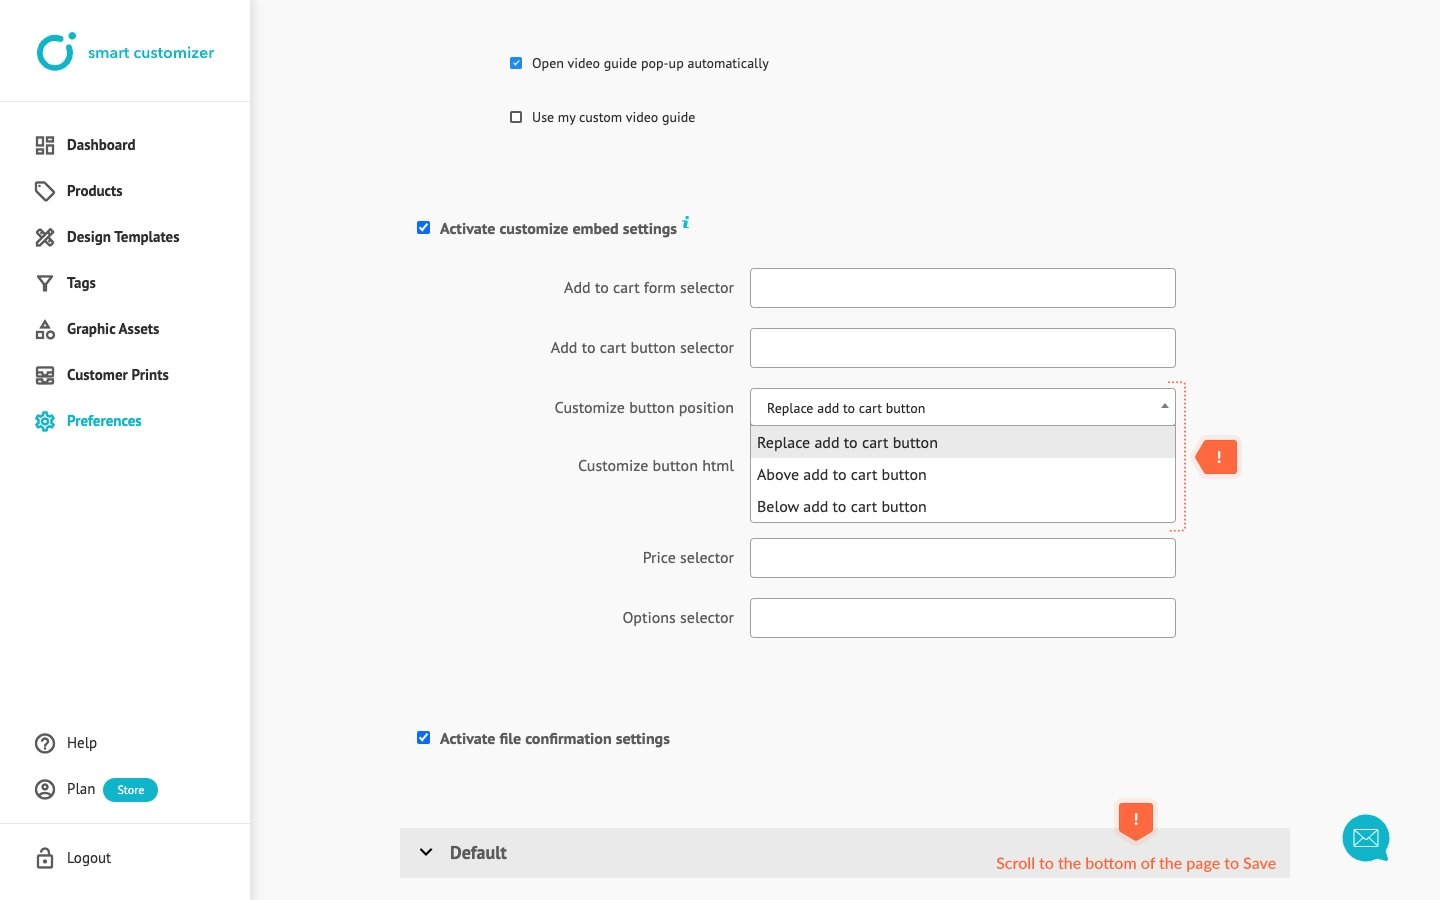
- You can adjust the position of the Customize Product button on the product page.
- By default, the Customize Product button replaces the Add to Cart button. However, you can position it either above or below the Add to Cart button if needed.
- To do this, simply click the Customize Button Position dropdown, select the desired option and Save your changes.
Customize button html
If necessary, you can define the button’s HTML and inline CSS styles in the Customize Button HTML field. Best way to do this is to copy existing button html snippet, modify it and add it to the button element:
- id: "smartcustomizer-link"
- class: "smartcustomizer-link"
- example button code: Customize
Price selector
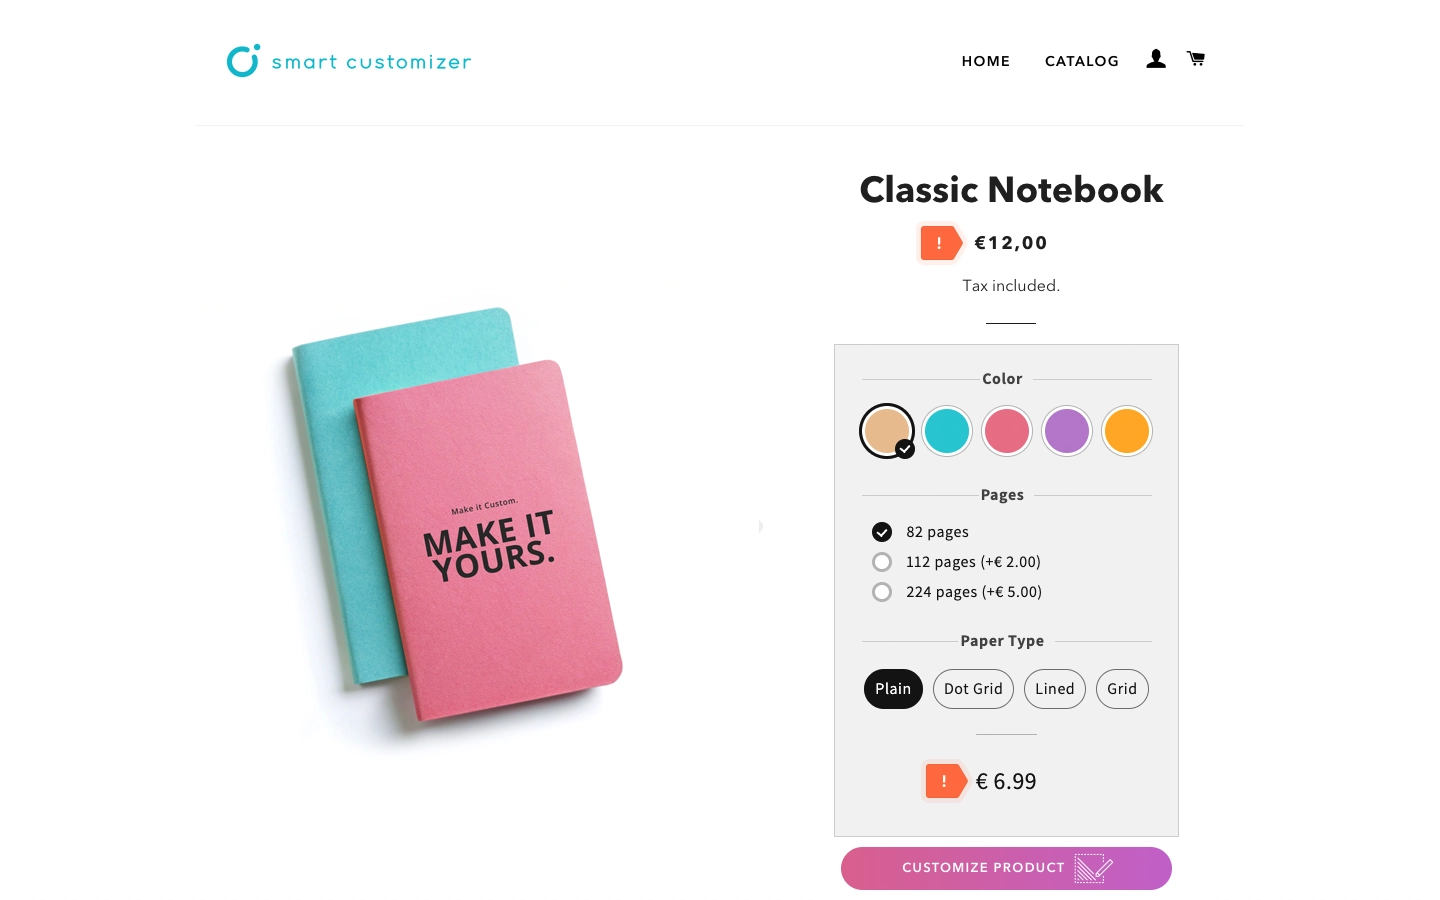
If not specified, the default Shopify price will be displayed separately from the customizable product price in the SC app option wrapper:
To ensure only the final customized product price is displayed:
- Open the product page on your store. Hover over the price, right-click, and select Inspect from the context menu.
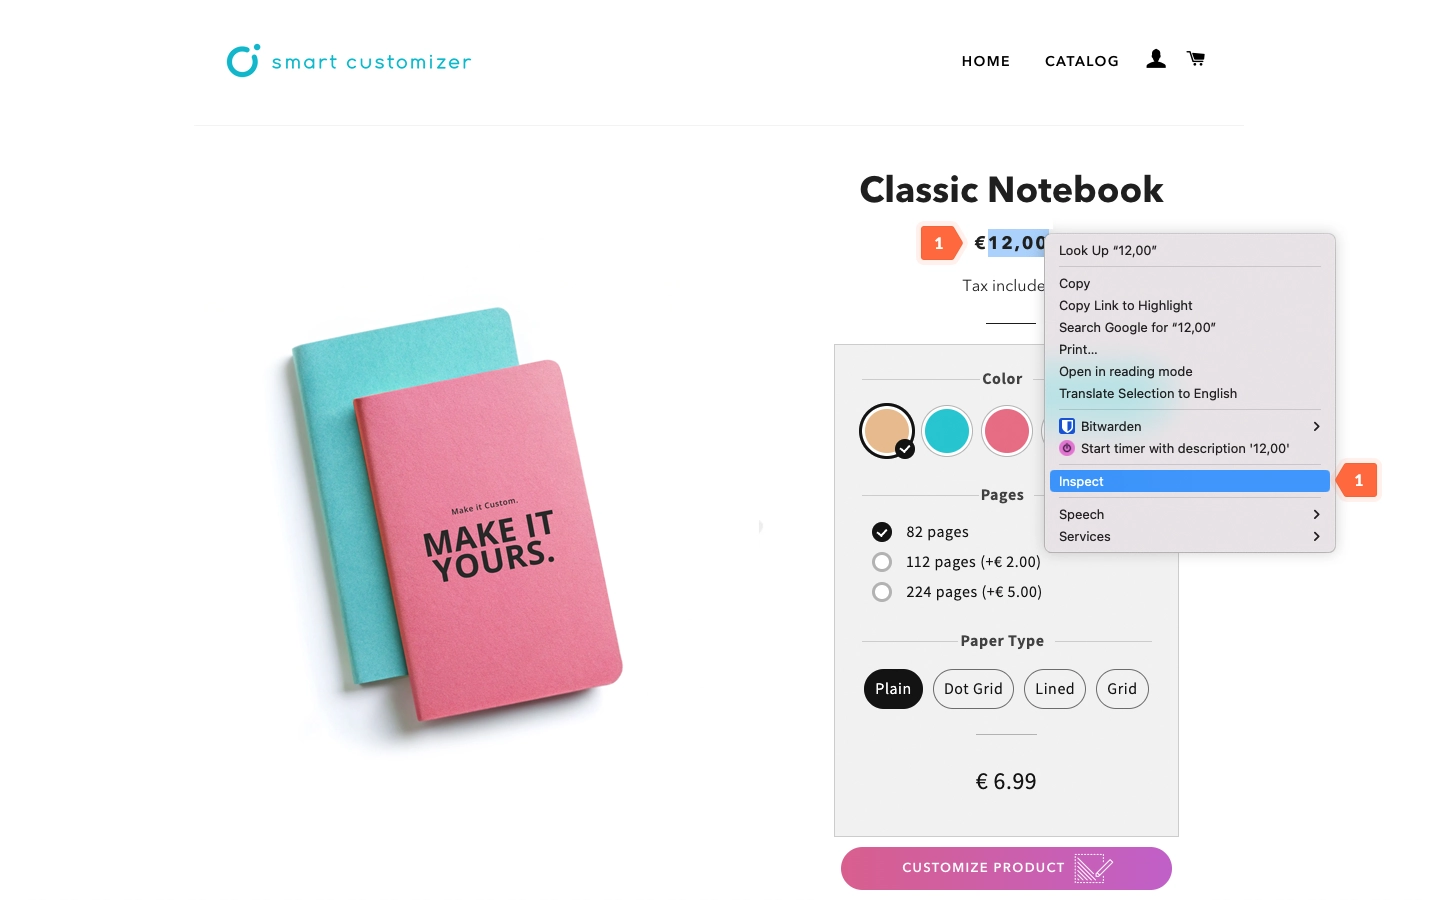
- Once the developer's console appears on your browser's screen, you will see the Elements tab open. Find the HTML code line starting div class=“no-js-hidden” id=price-template…, right-click it, and copy the selector.
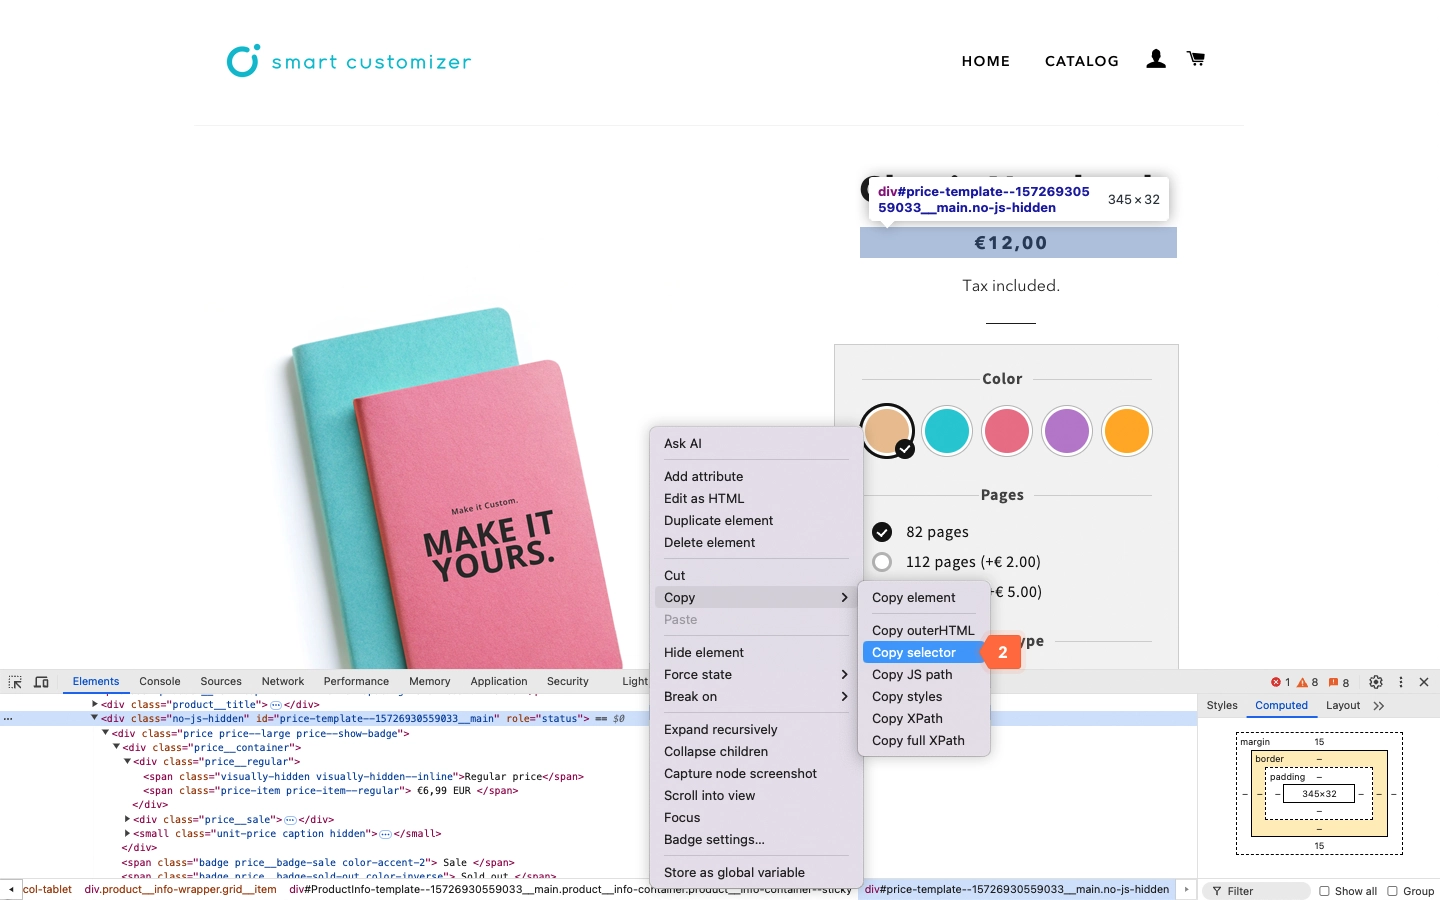
- Paste the copied selector into the Options Selector field.
- Click Save.
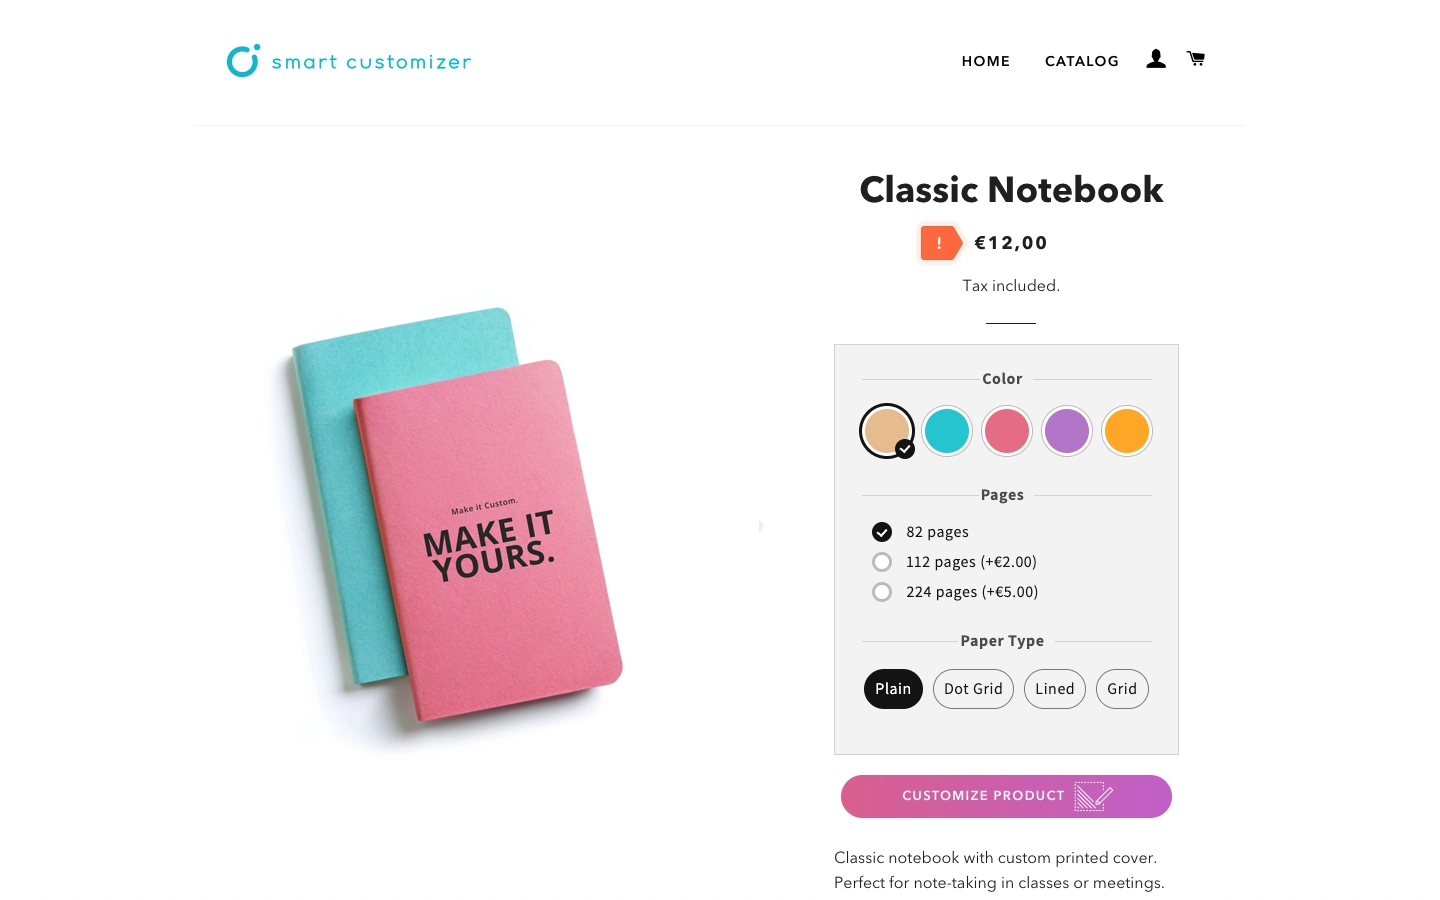
Now, only the final customized price will be displayed:
Options selector
- If the Options selector is not specified, the Smart Customizer option wrapper will appear above the Customize Product button.
- If your product has other Shopify variations, we recommend using the Options Selector to position the Smart Customizer option panel below the other Shopify product variant options.
NOTE: These settings require some basic knowledge of HTML/CSS and how to use the developer console of your browser. So if you need assistance, feel free to contact our support team.
